
How to use PlannerWick, step by step
Every tool, every button, with real screenshots. 10 chapters, 39 steps. Jump to what you need, or read from the top.
1Getting started
Open any tool. Nothing to install, no account needed.
-
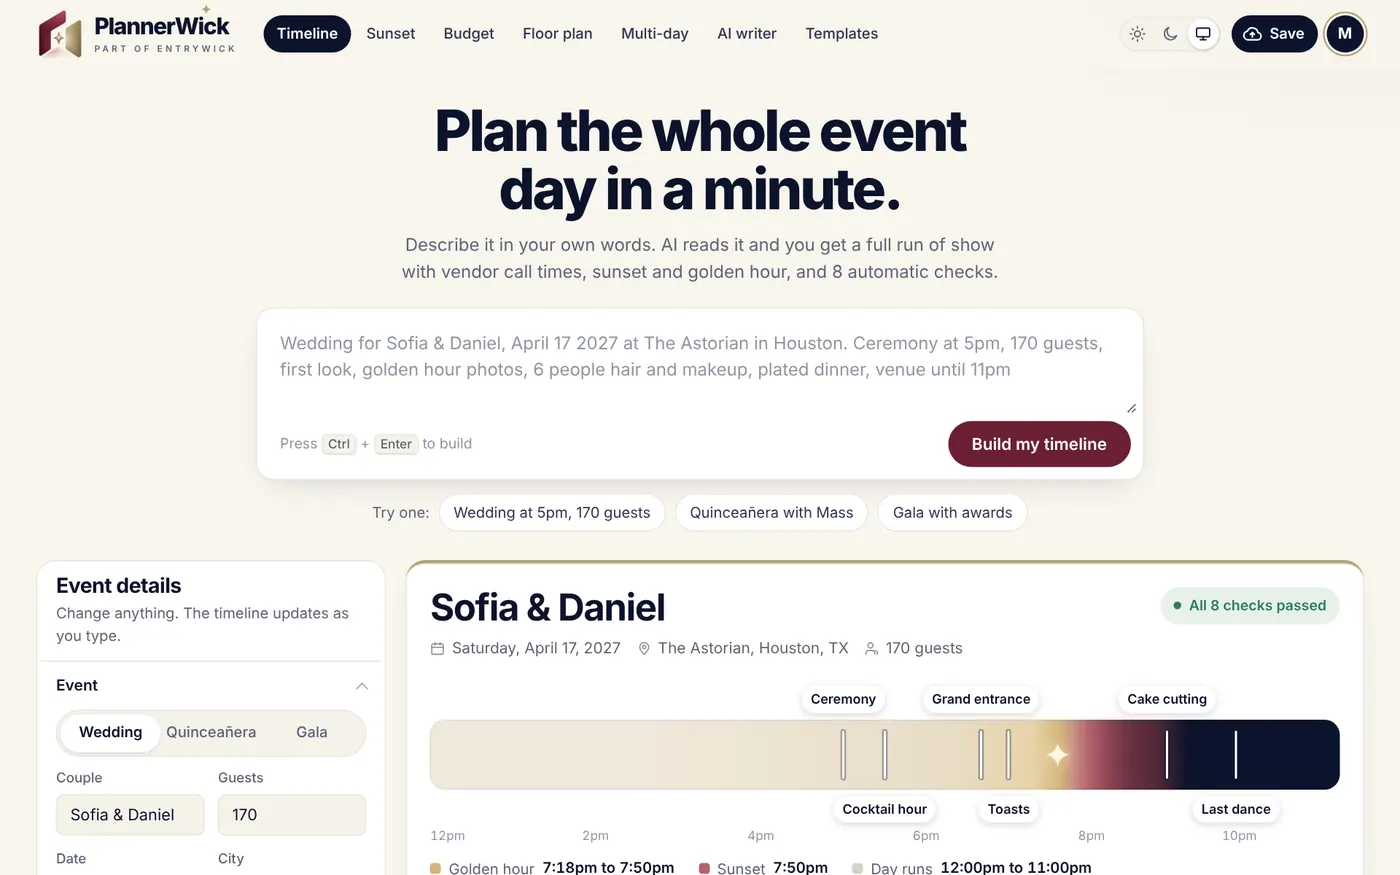
Open a tool
Go to plannerwick.com and pick a tool from the menu at the top: Timeline, Sunset, Budget, Floor plan, Multi-day, AI writer or Templates. Everything works straight away in your browser, and your work is kept on that device while you plan.
-
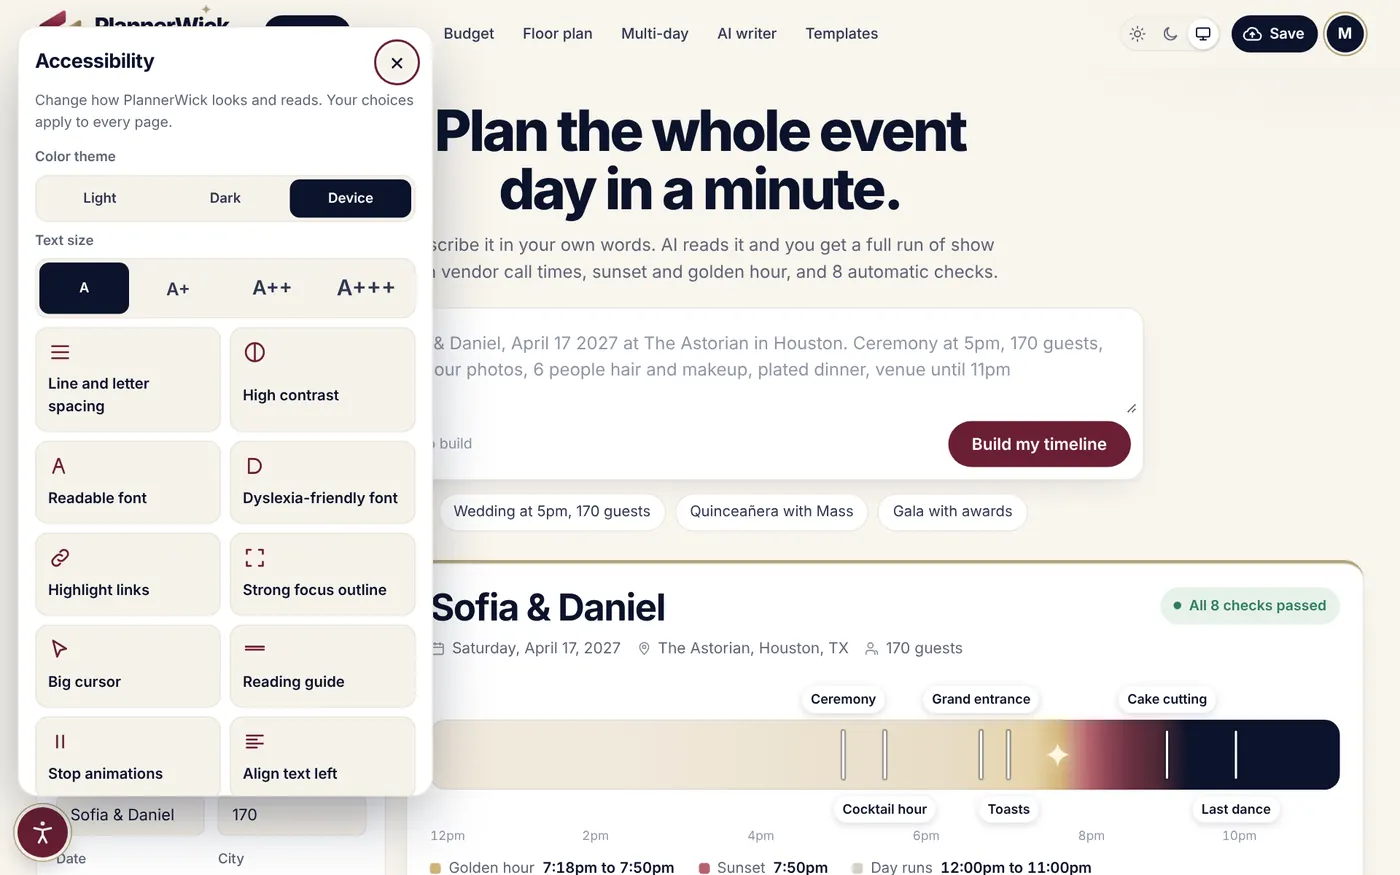
Make it comfortable to read
Use the sun, moon and screen buttons at the top right for light mode, dark mode or your device's setting. The round button at the bottom left (or Alt + A) opens the accessibility menu: bigger text, high contrast, a dyslexia-friendly font, extra spacing, a reading guide and more.
-
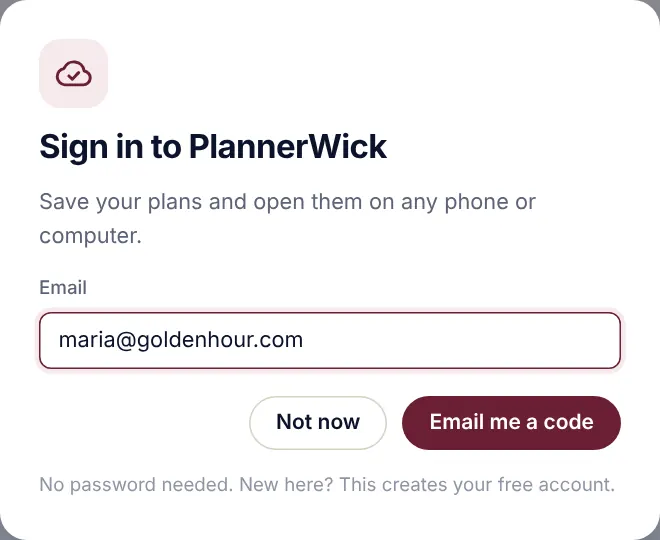
Sign in to save across devices
Press Save or Sign in, type your email and press Email me a code. Enter the 6-digit code from the email. There's no password, and a new email creates a free account.
-
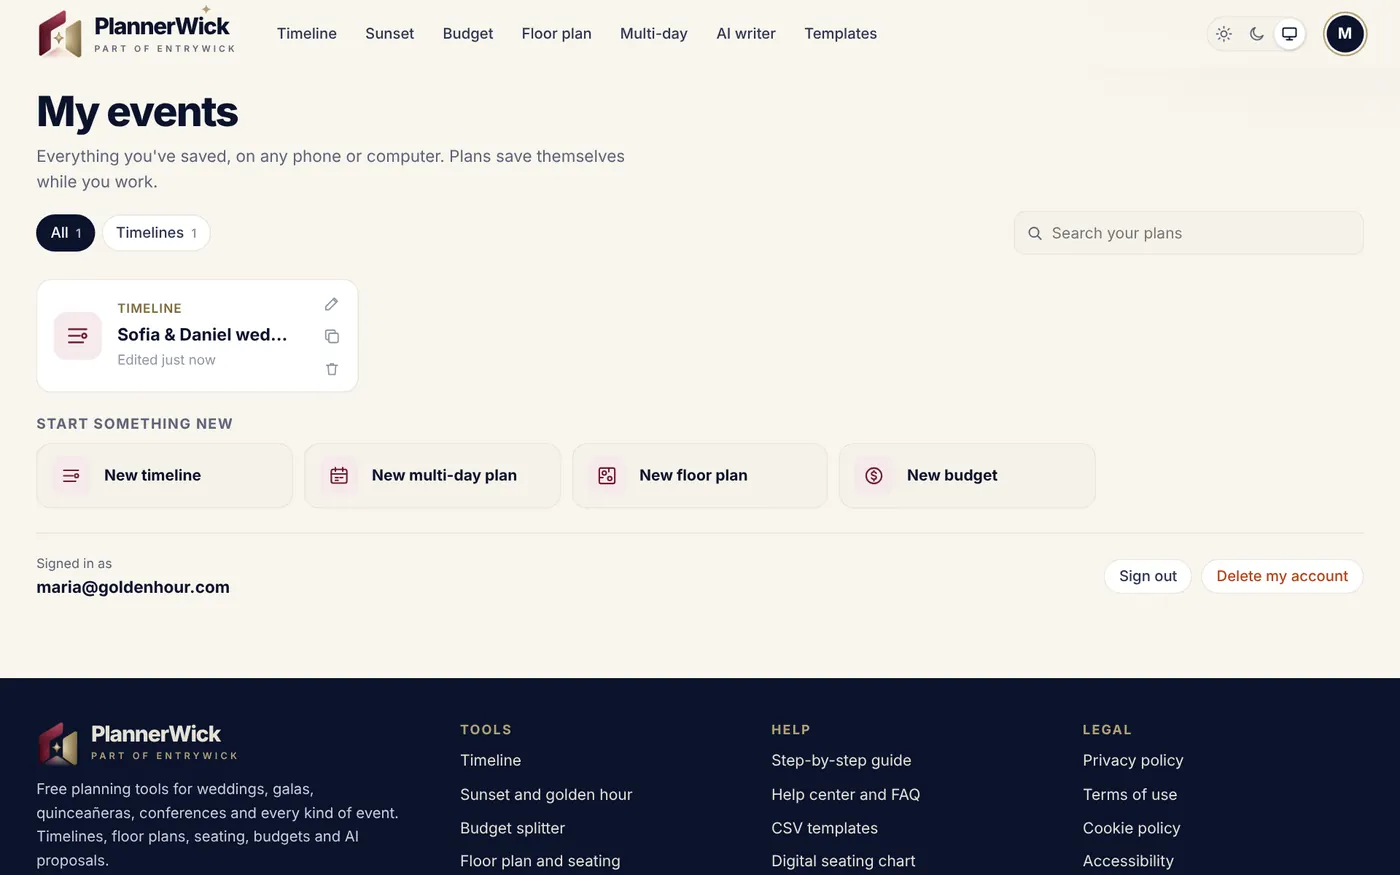
Find everything in My events
Once signed in, open My events from your account circle. Every timeline, multi-day plan, floor plan, budget and saved layout is listed there, with search, filters and buttons to start something new. You can delete a plan, or your whole account, from here.
2Build a day-of timeline
From a few sentences to a full run of show with vendor call times, sunset and 8 automatic checks.
-
Describe the event in your own words
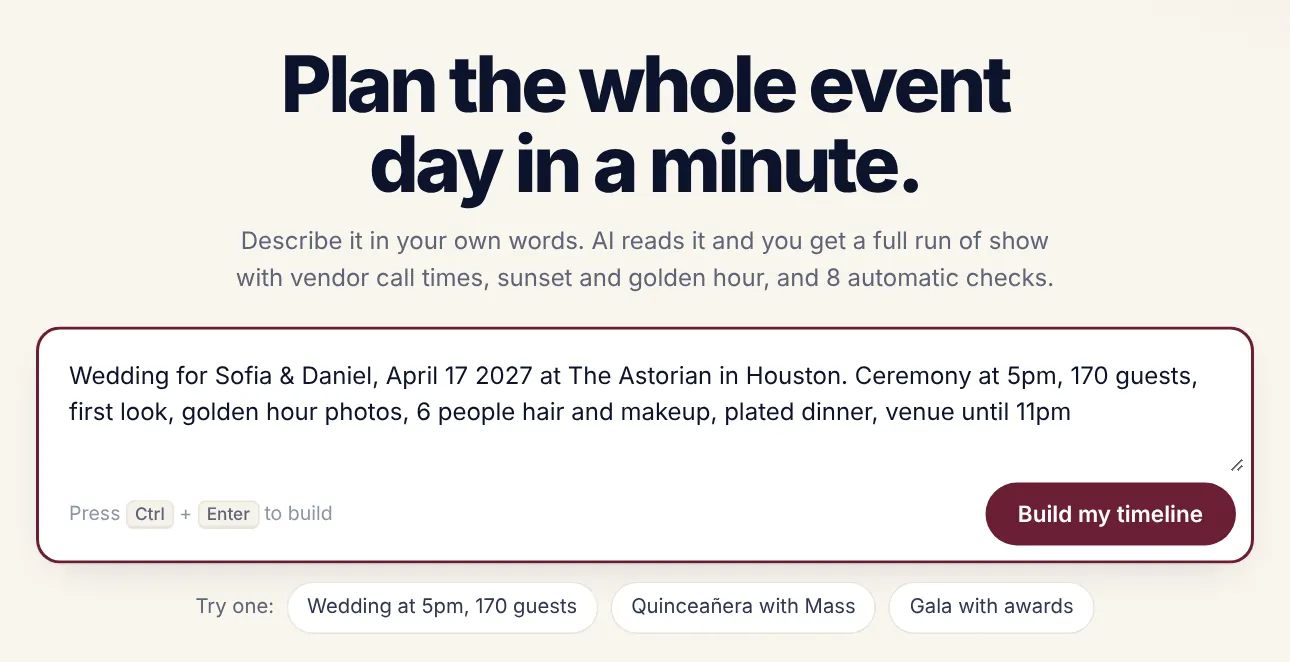
Type the basics into the big box: who, the date, the venue and city, the ceremony time, guest count, and anything special such as a first look, hair and makeup for 6 or a plated dinner. Then press Build my timeline, or try one of the examples underneath.
-
Check what was understood
PlannerWick reads your words, fills every detail it finds and shows them as chips. AI fills anything the quick rules missed and marks it “AI added”. Things the timeline can't hold, such as a mehndi night on another day, are listed so you can add them by hand.
-
Read the summary and the day ribbon
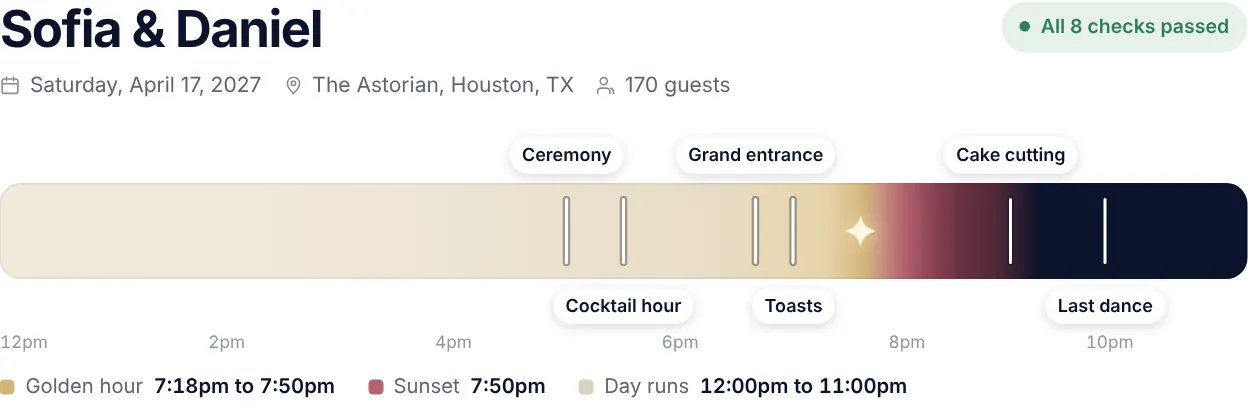
The summary card shows the couple, date, venue and guests, a ribbon of the whole day from setup to the last dance, golden hour and sunset for that city and date, and whether all automatic checks passed.
-
Change any detail on the left
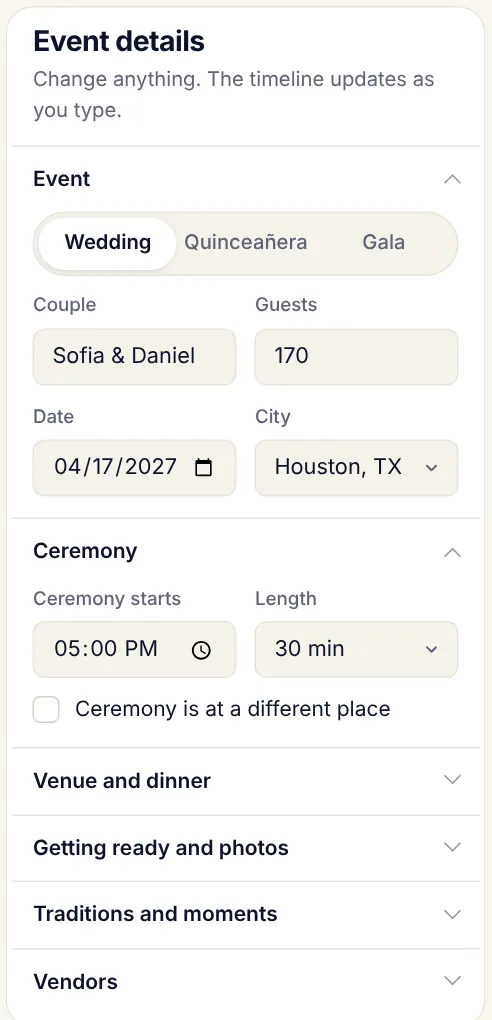
The Event details panel holds every setting: event type, names, guests, date, city, ceremony start and length, venue hours, dinner style, getting ready, photos, traditions and vendors. The timeline updates as you type. On a phone, press Edit details.
-
Read it the way each person needs it
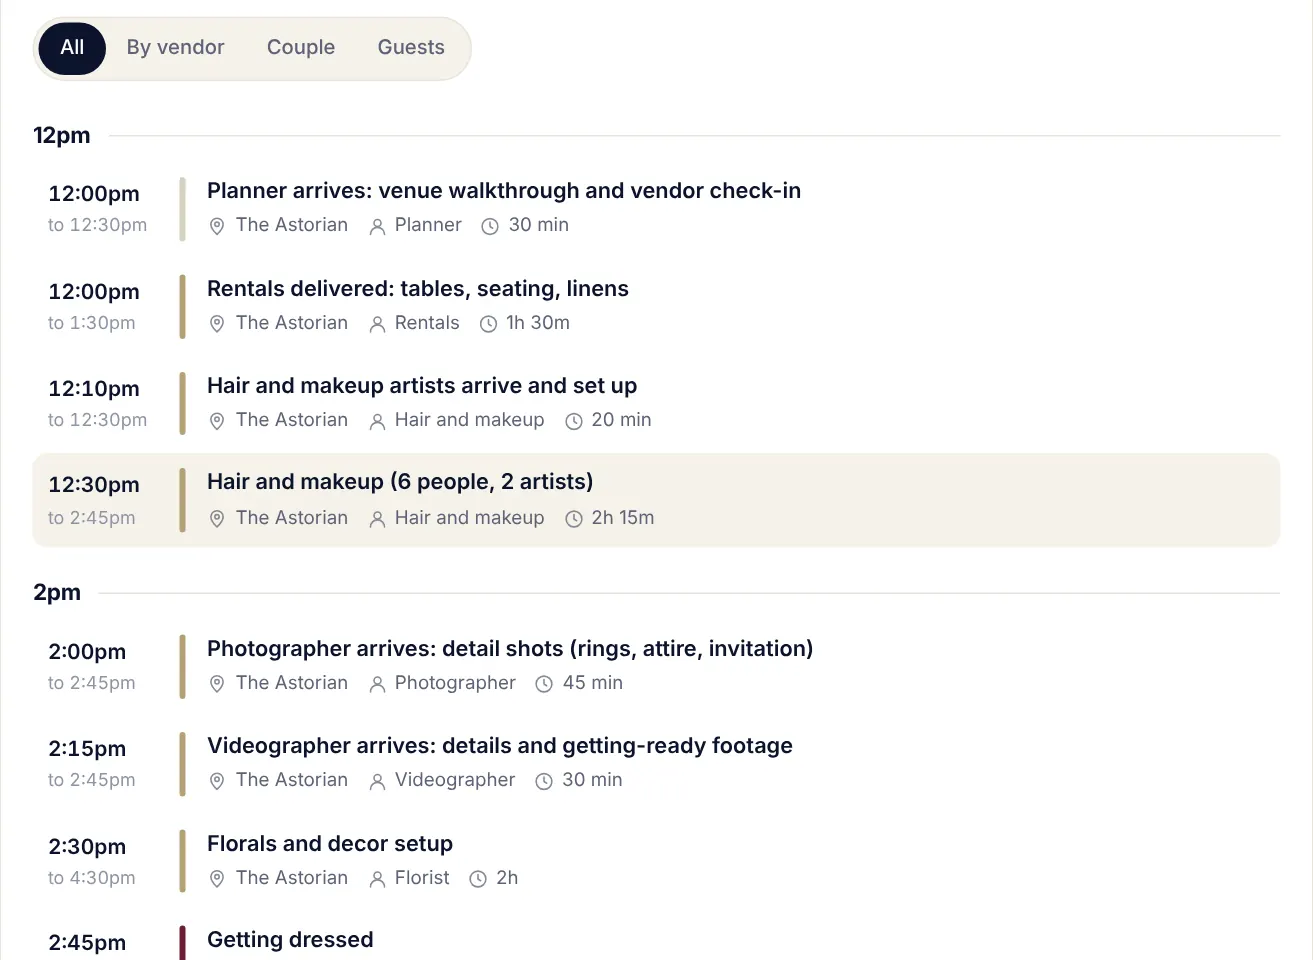
Switch the tabs above the timeline: All, By vendor, Couple or Guests. Click any row to move its time or lock it so it never shifts. Rows are grouped by hour, with where, who and how long.
-
Let the checks catch problems
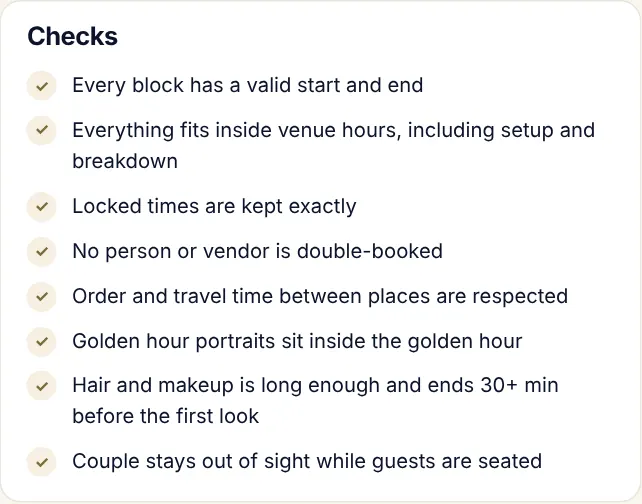
Eight checks run every time you change something: valid times, everything inside venue hours, locked times kept, nobody double-booked, travel time between places, golden hour portraits inside golden hour, enough hair and makeup time, and the couple out of sight while guests are seated. A failed check says exactly what to change.
-
Send every vendor their own live link
Save the timeline to your account, then press Create vendor links. Each vendor gets a private page with only their times. When you change the timeline their page updates by itself, and you can see who has opened it and pressed Got it.

-
Share, print or download
Use Copy share link, Print or PDF, Add to calendar, Spreadsheet or Copy as text. Further down you'll also find the photo shot list, weather watch for the date, and Add a live photo wall for guests' photos.

3Find sunset and golden hour
Photo timing for any city and date.
-
Pick the date and city
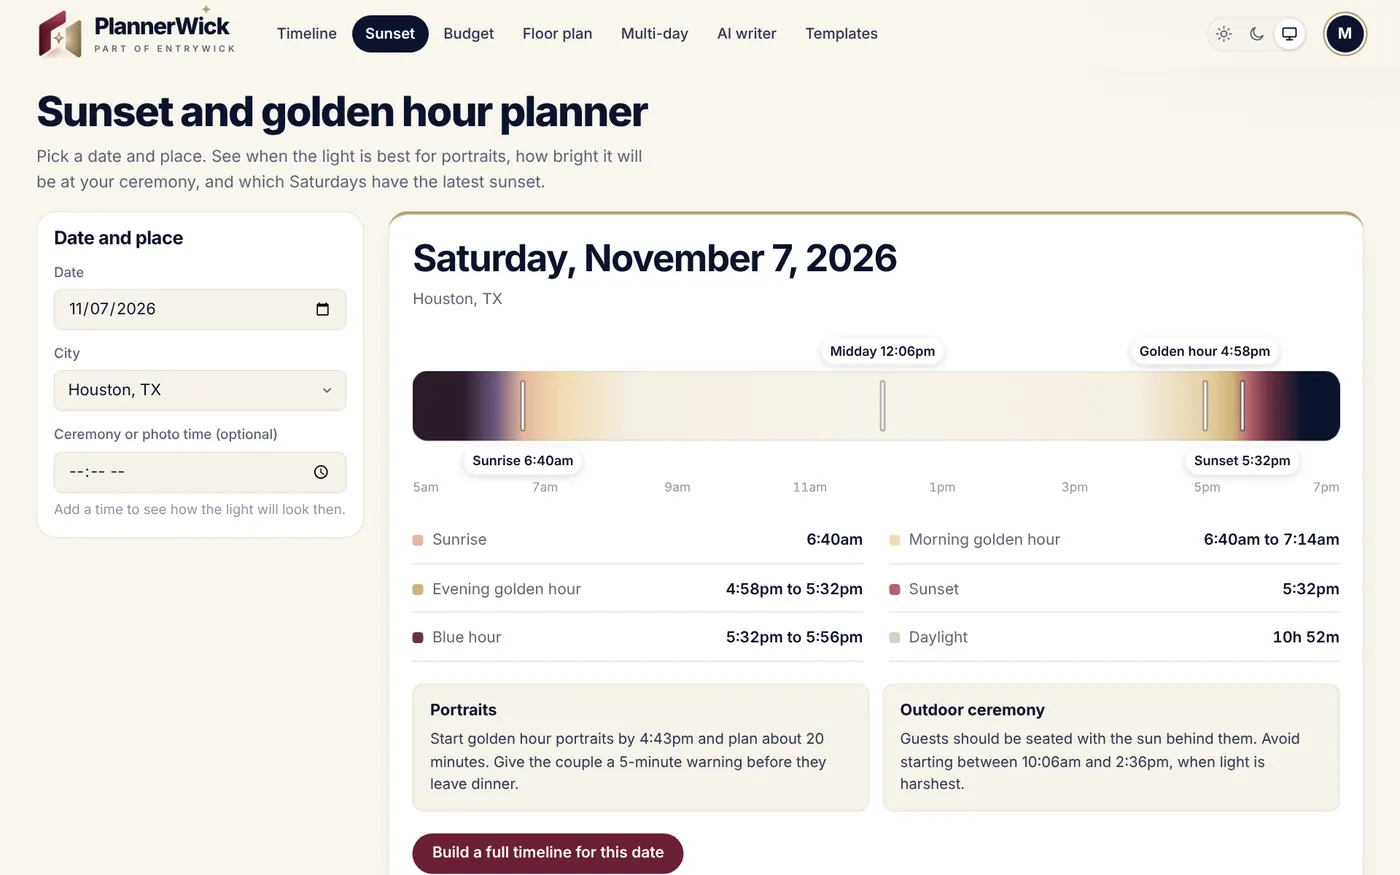
Choose the date, then search for the city. Add a ceremony or photo time if you have one, and PlannerWick shows how the light will be at that moment.
-
Plan portraits around the light
Read the morning and evening golden hour, sunset and blue hour, plus advice for portraits and outdoor ceremonies. The list of upcoming Saturdays helps when the date isn't set yet. Press Build a full timeline for this date to carry it into the Timeline.
4Split a budget
A typical split across every category, in seconds.
-
Enter the total and guest count
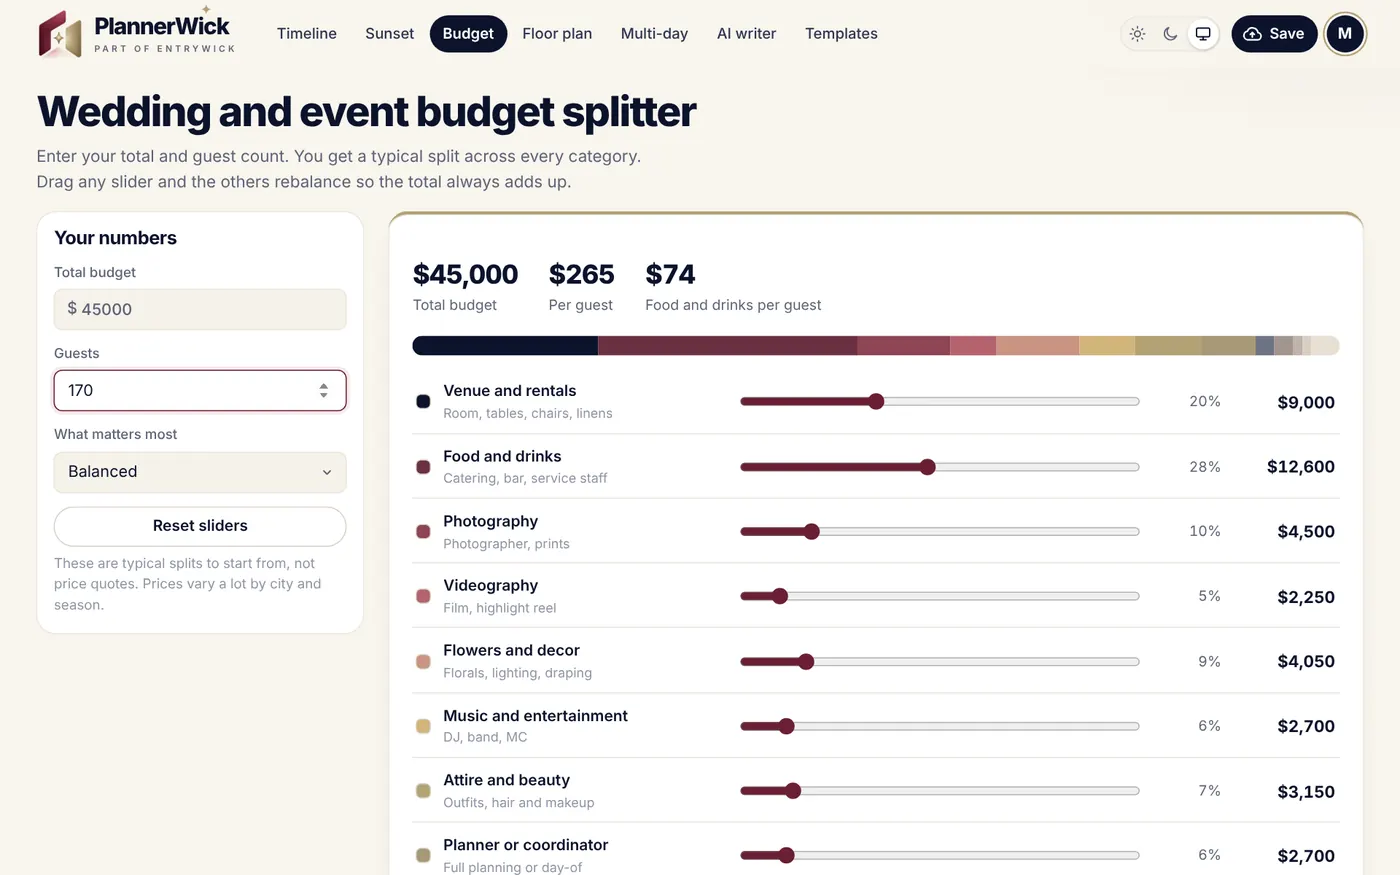
Type your total budget and guests, and choose What matters most. You get a typical split for venue, food, photography, flowers, music and every other category, with the cost per guest.
-
Drag to make it yours
Drag any slider and the others rebalance so the total always adds up. Reset sliders goes back to the typical split. Share, print or download it as a spreadsheet. These are starting points, not quotes.
5Design the floor plan and seat guests
Any room, 10 to 10,000+ guests, with a live seat finder.
-
Start with a layout
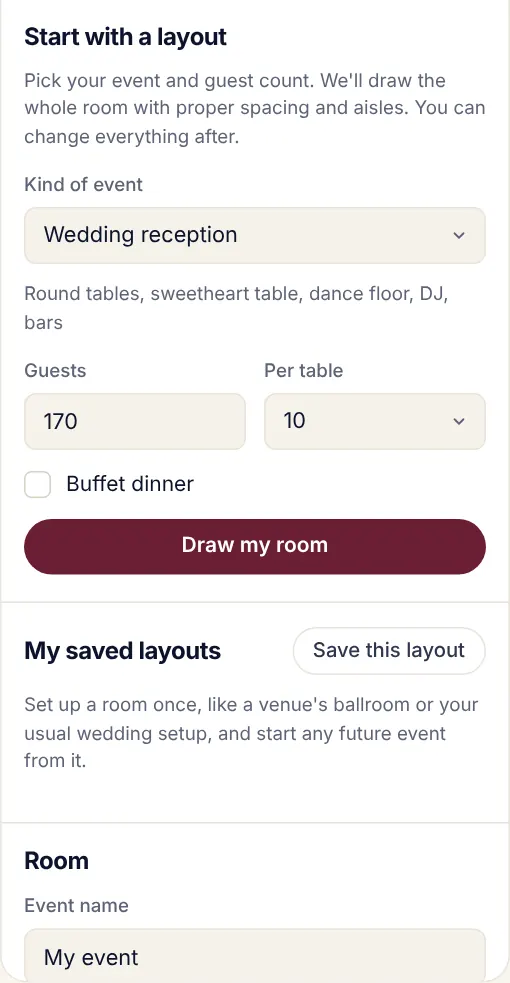
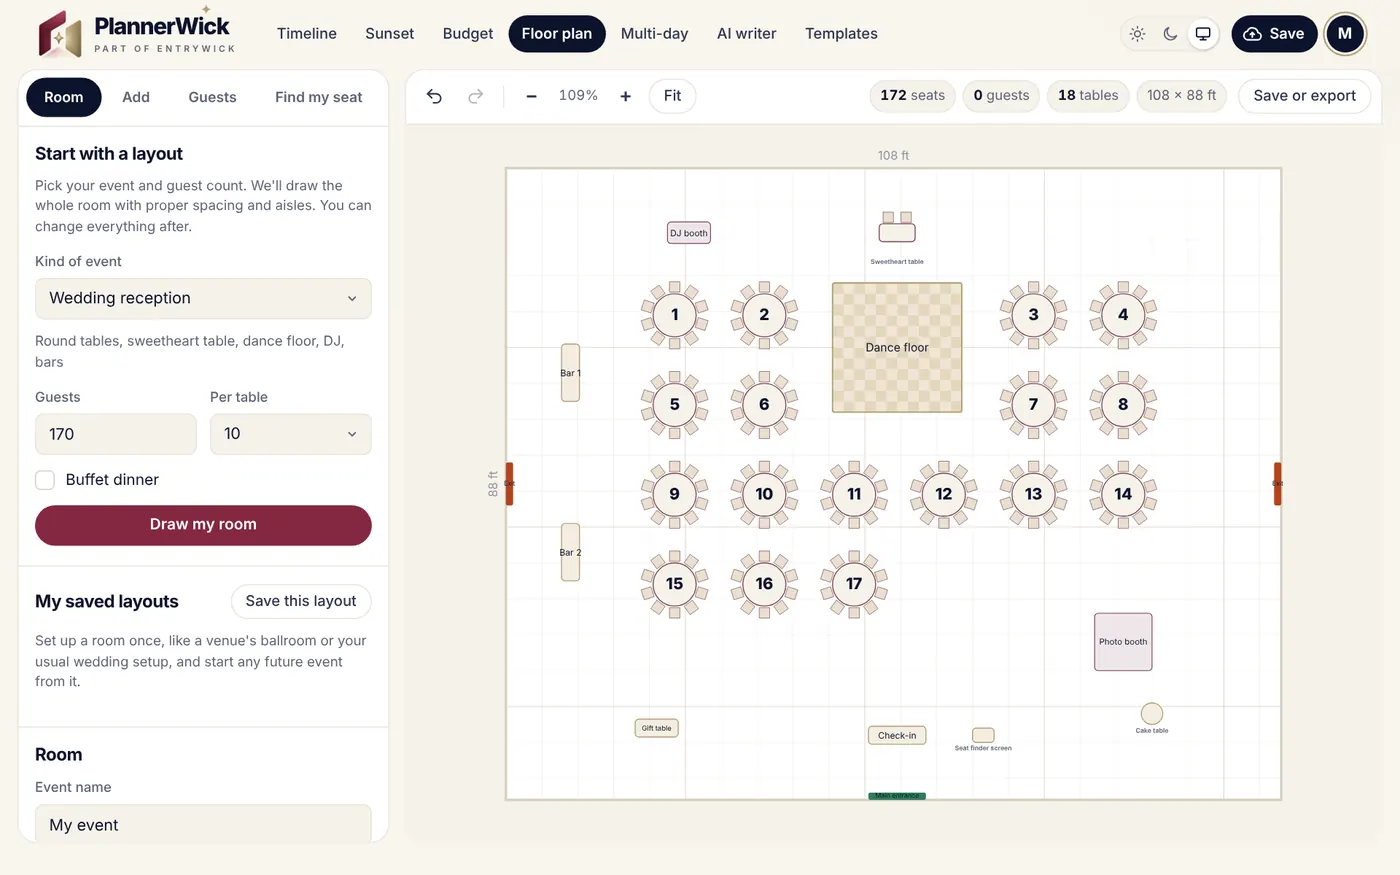
On the Room tab, pick the kind of event and the number of guests and seats per table, then press Draw my room. PlannerWick draws the whole room with proper spacing and aisles: tables, dance floor, stage, bars, DJ and check-in.
-
Adjust the room
Drag anything to move it, or use the Add tab for more tables, stages, bars and other items. Select an item and use the arrow keys to nudge it, R to rotate and Delete to remove it. Ctrl + Z undoes. The counts at the top show seats, guests, tables and room size.
-
Add guests and seat them
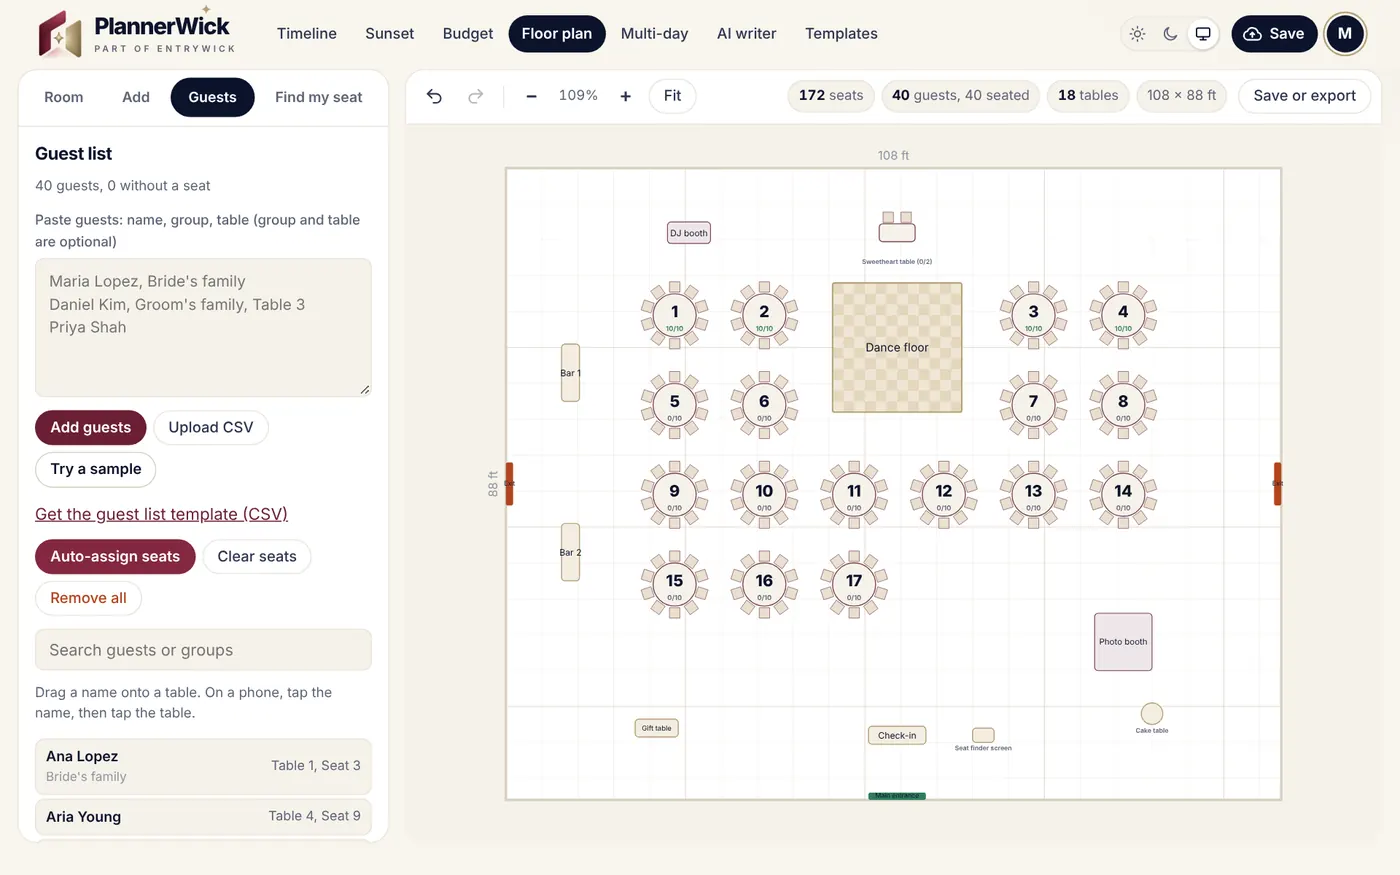
On the Guests tab, paste names (name, group, table), press Upload CSV or Try a sample. Press Auto-assign seats to seat everyone with their group, then drag anyone to another seat.
-
Turn on the live seat finder
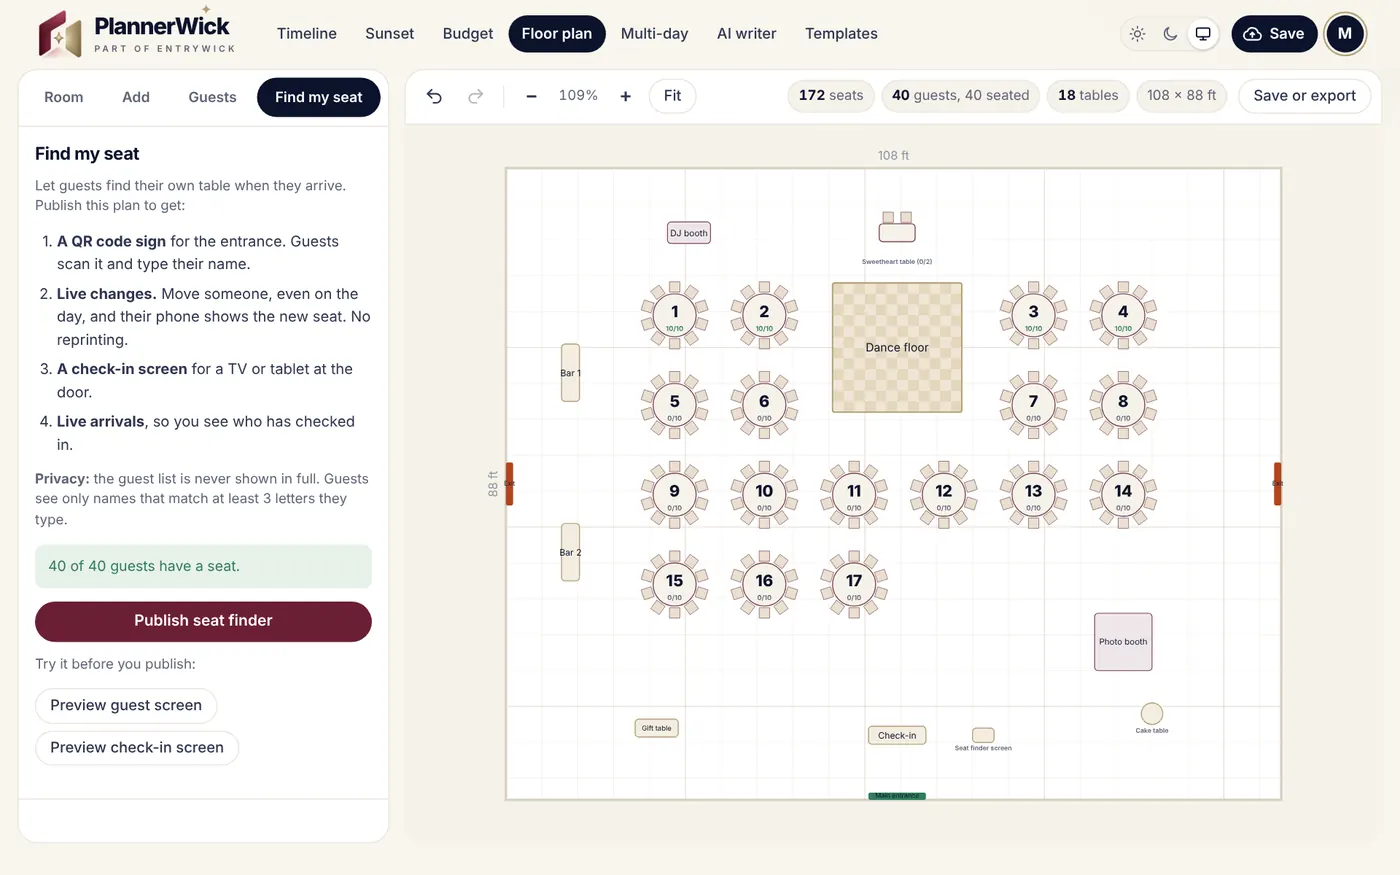
On the Find my seat tab, press Publish seat finder. Guests scan the QR code at the entrance and type their name to see their table on the map. Move anyone afterwards and guests' phones update within about a minute, so you never reprint a chart.
-
Save the room for future events
Press Save this layout and give it a name, venue, labels and notes. It appears under My saved layouts with a picture, and Use this layout starts any future event from it.
6Make a quick seating chart
Paste a guest list, get tables.
-
Paste or upload the guest list
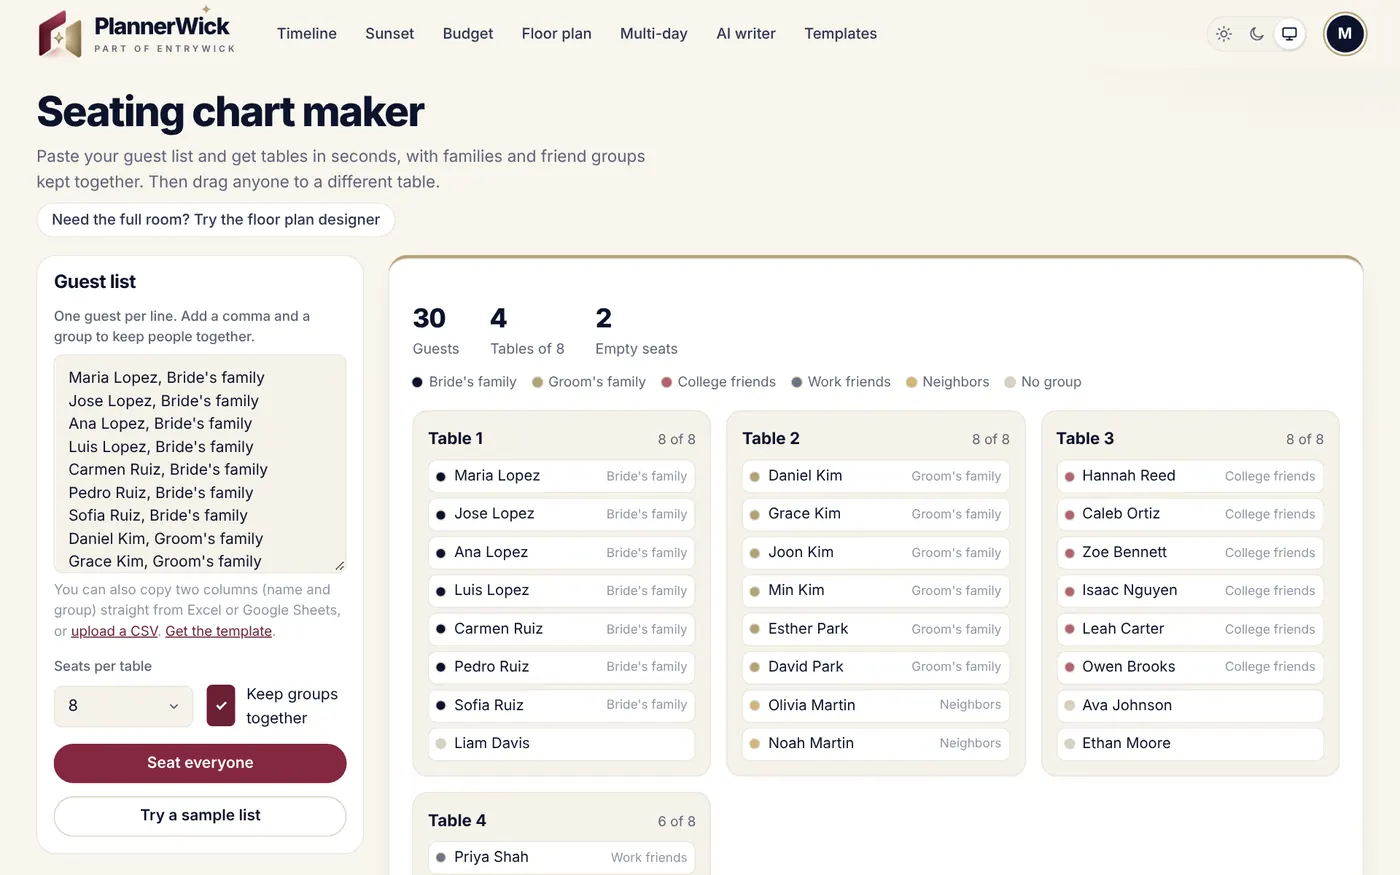
One guest per line, with a comma and a group to keep people together, or upload a CSV. Choose seats per table and keep Keep groups together ticked, then press Seat everyone.
-
Fix and print
Drag anyone to another table or add a table. Print it, download it as a spreadsheet, or copy it as text. For a drawn room and a seat finder, use the Floor plan.
7Plan a multi-day event
Conferences, retreats and week-long weddings: every day, room and meal.
-
Start from a plan or your spreadsheet
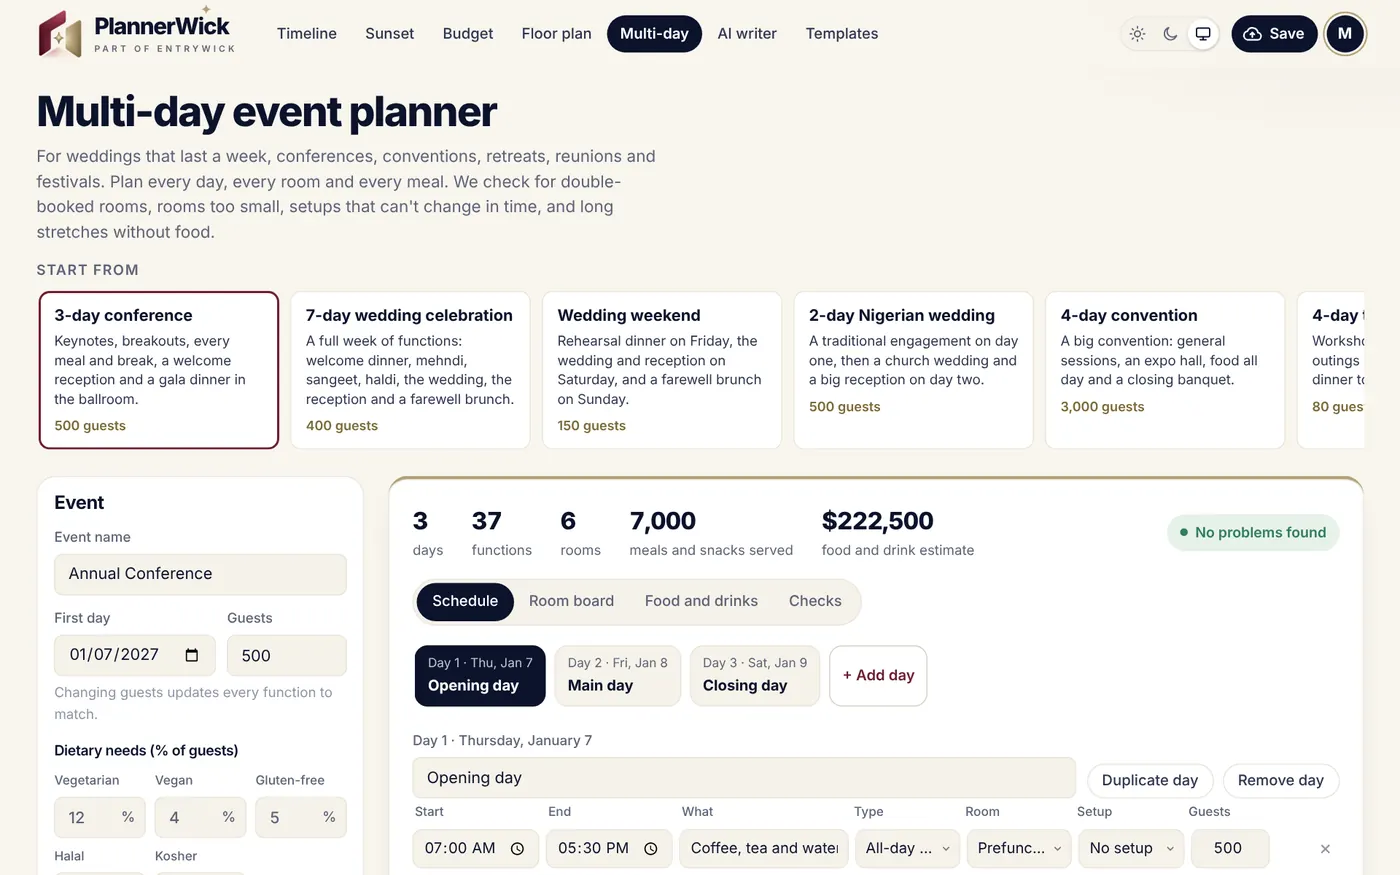
Pick a ready-made plan under Start from, such as a 3-day conference or a 7-day wedding celebration, or press Import schedule (CSV) to bring in your own. Set the event name, first day and guests on the left.
-
Build each day
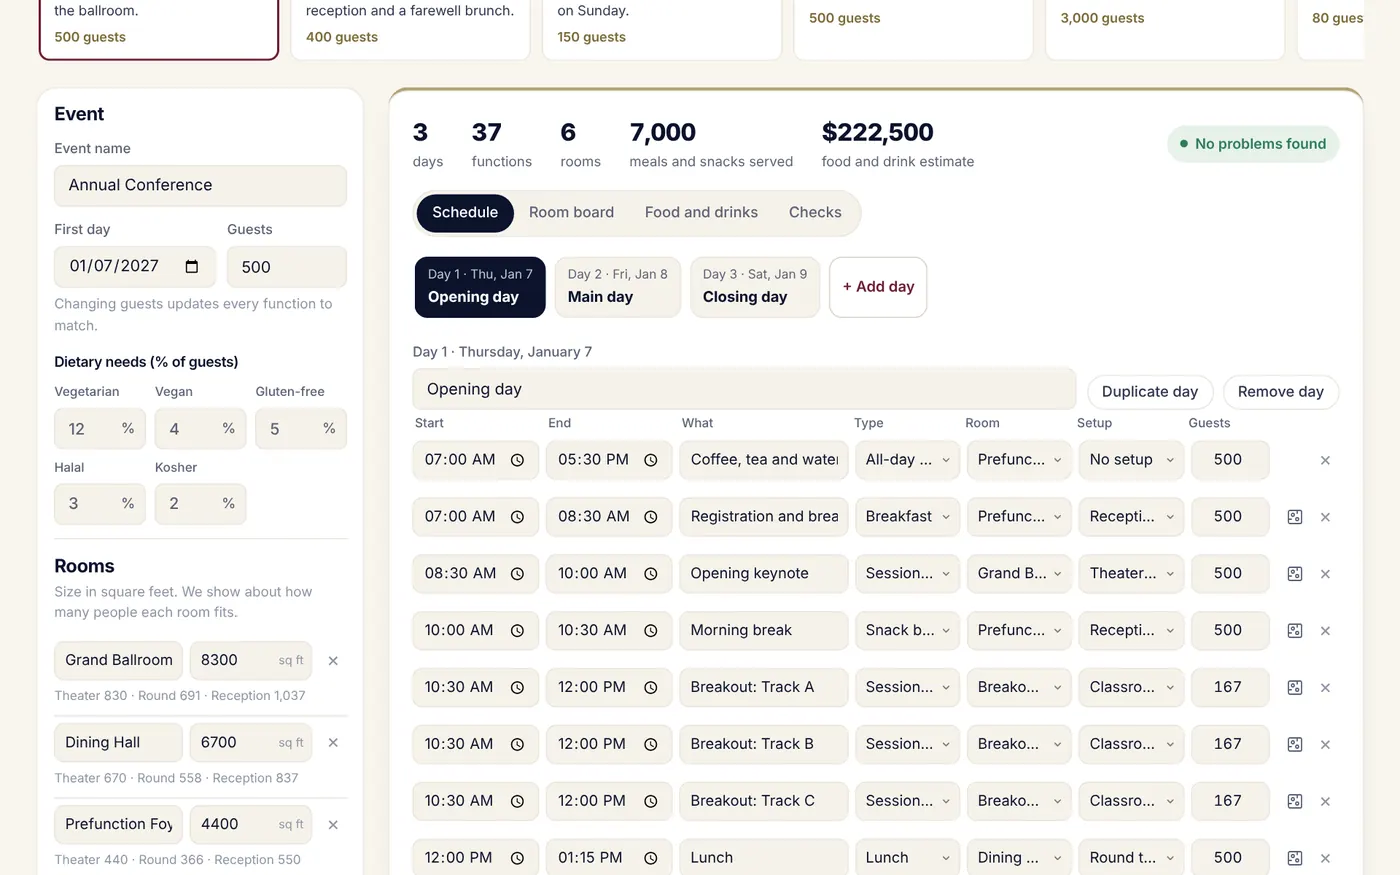
Pick a day tab and edit each function: start, end, what, type, room, setup and guests. Use + Add function, + Add day, Duplicate day and Remove day. Add rooms with their size in square feet to see how many people each fits.
-
See every room at a glance
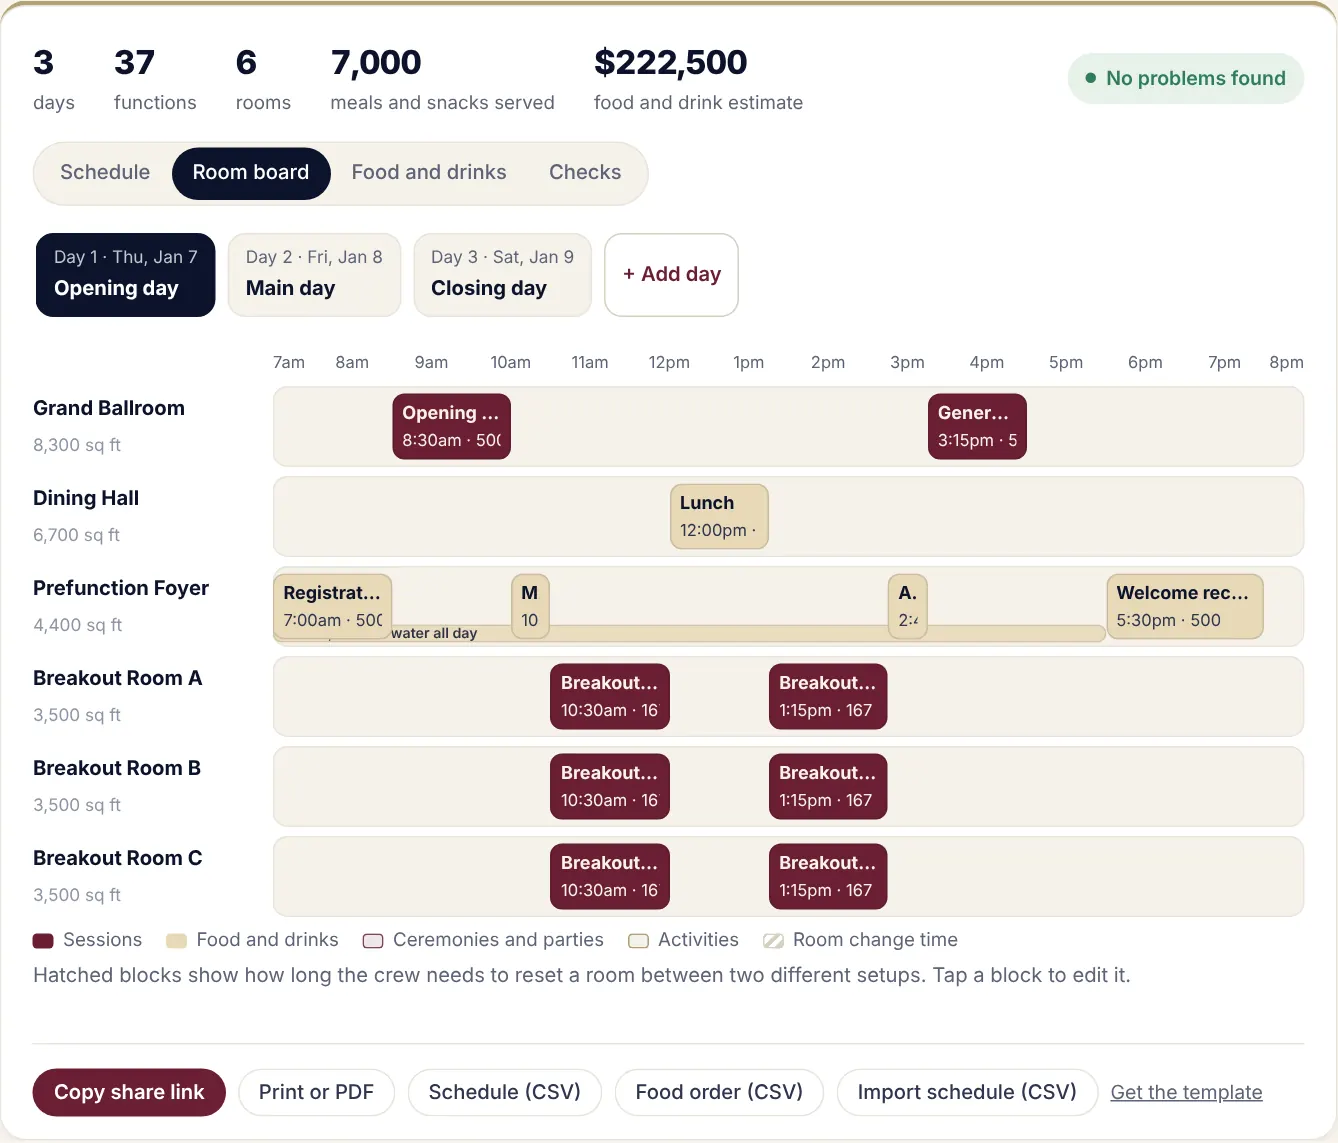
The Room board shows each room's day as blocks, with hatched time where the crew turns a room over between setups.
-
Estimate food and drink
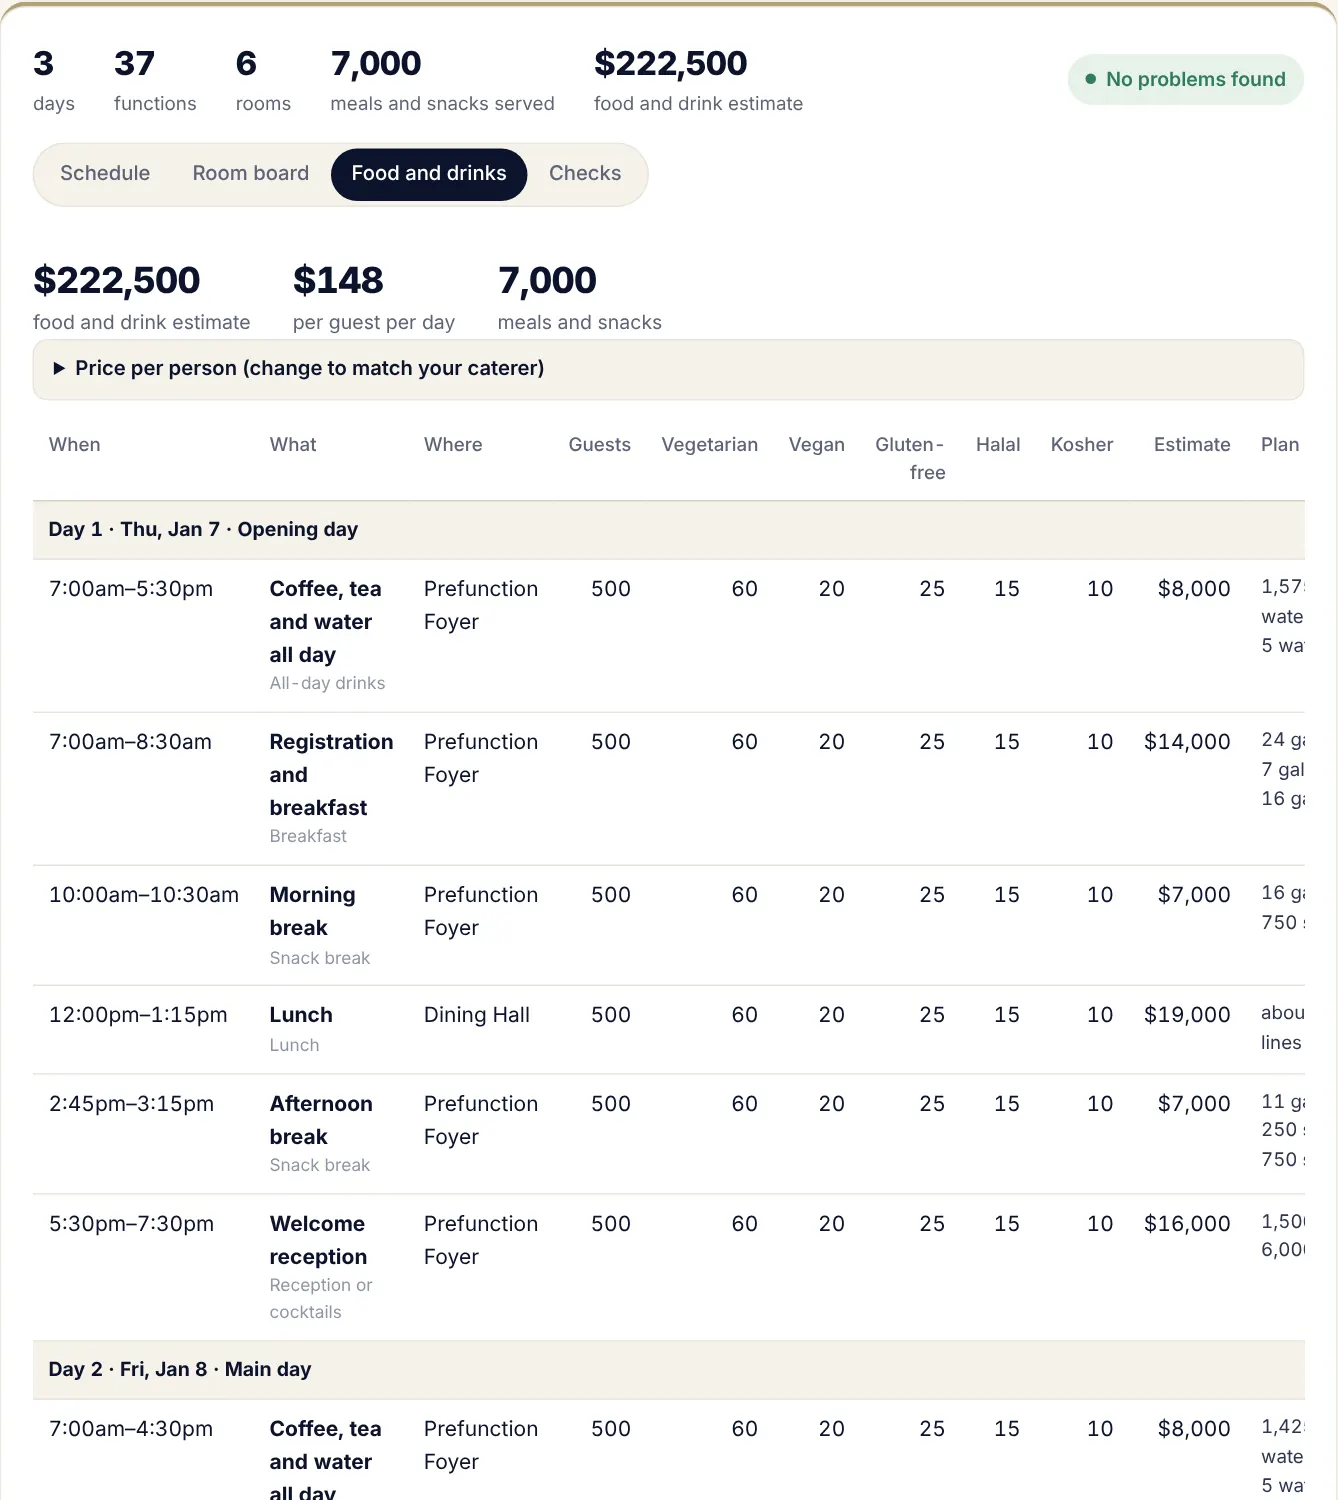
Food and drinks counts every meal and snack with vegetarian, vegan, gluten-free, halal and kosher numbers from your dietary percentages, and estimates the cost. Change the price per person to match your caterer.
-
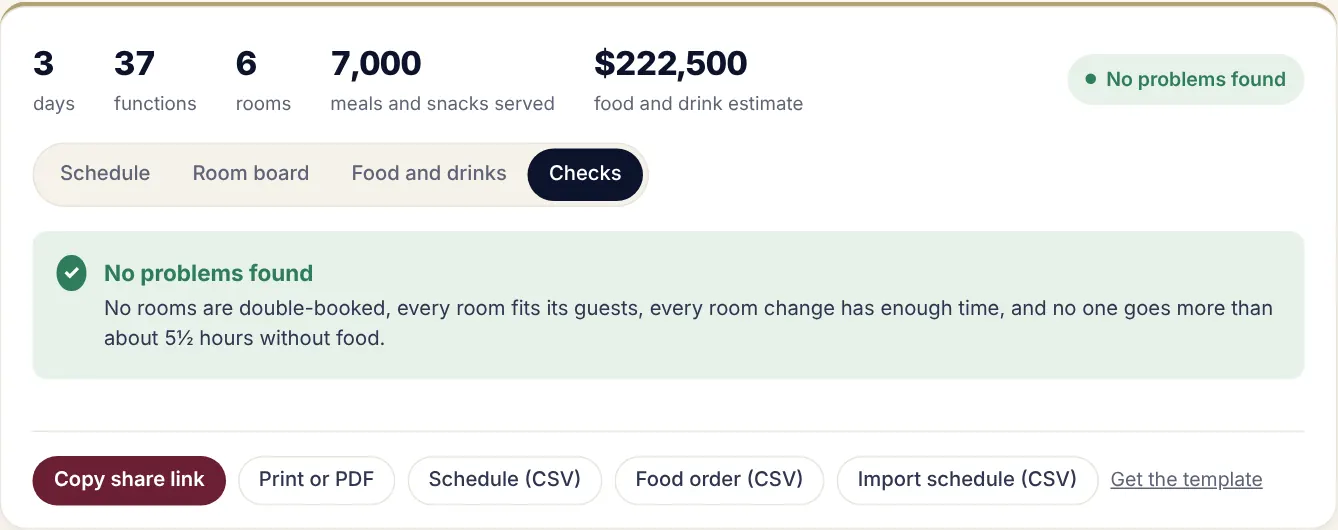
Let the checks find conflicts
Checks flags double-booked rooms, rooms too small for their setup, room changes without enough turnover time, and long stretches with no food.
-
Share, print or export
Copy share link, Print or PDF, Schedule (CSV) and Food order (CSV). The schedule file imports back in, so you can edit in Excel and bring it back.

8Reply to inquiries and send proposals
AI drafts in your voice; your prices; a client page they can approve.
-
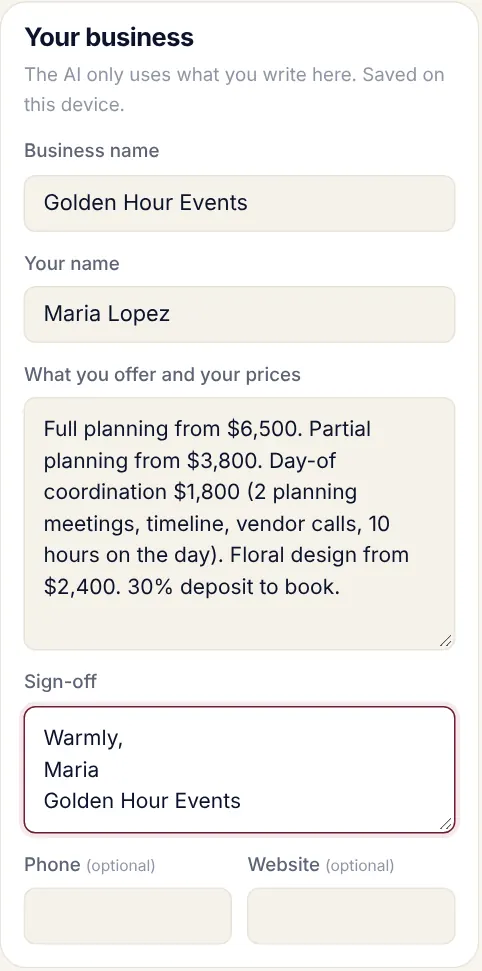
Tell it about your business once
Fill in Your business: business name, your name, what you offer with prices, and your sign-off. The AI only uses what you write here, and it's saved on this device.
-
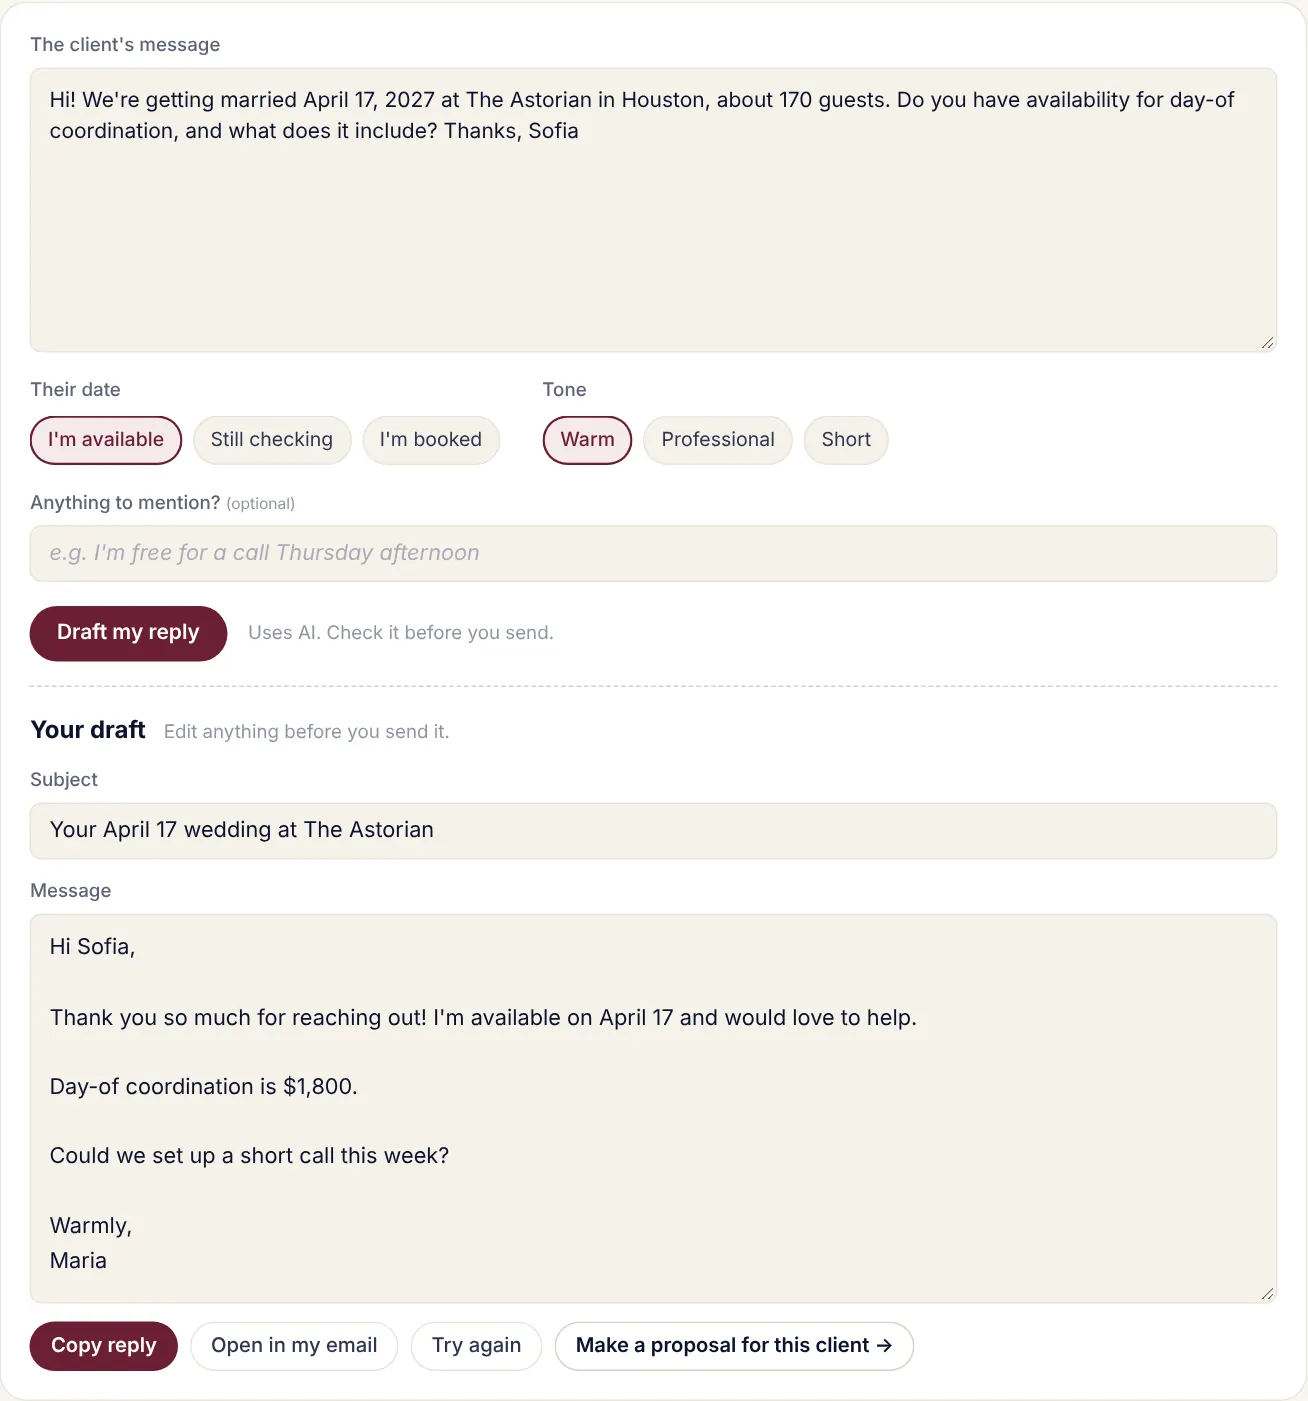
Draft a reply to an inquiry
Paste the client's message, choose whether you're available, still checking or booked, pick a tone, add anything to mention, and press Draft my reply. Edit the subject and message, then copy or email it.
-
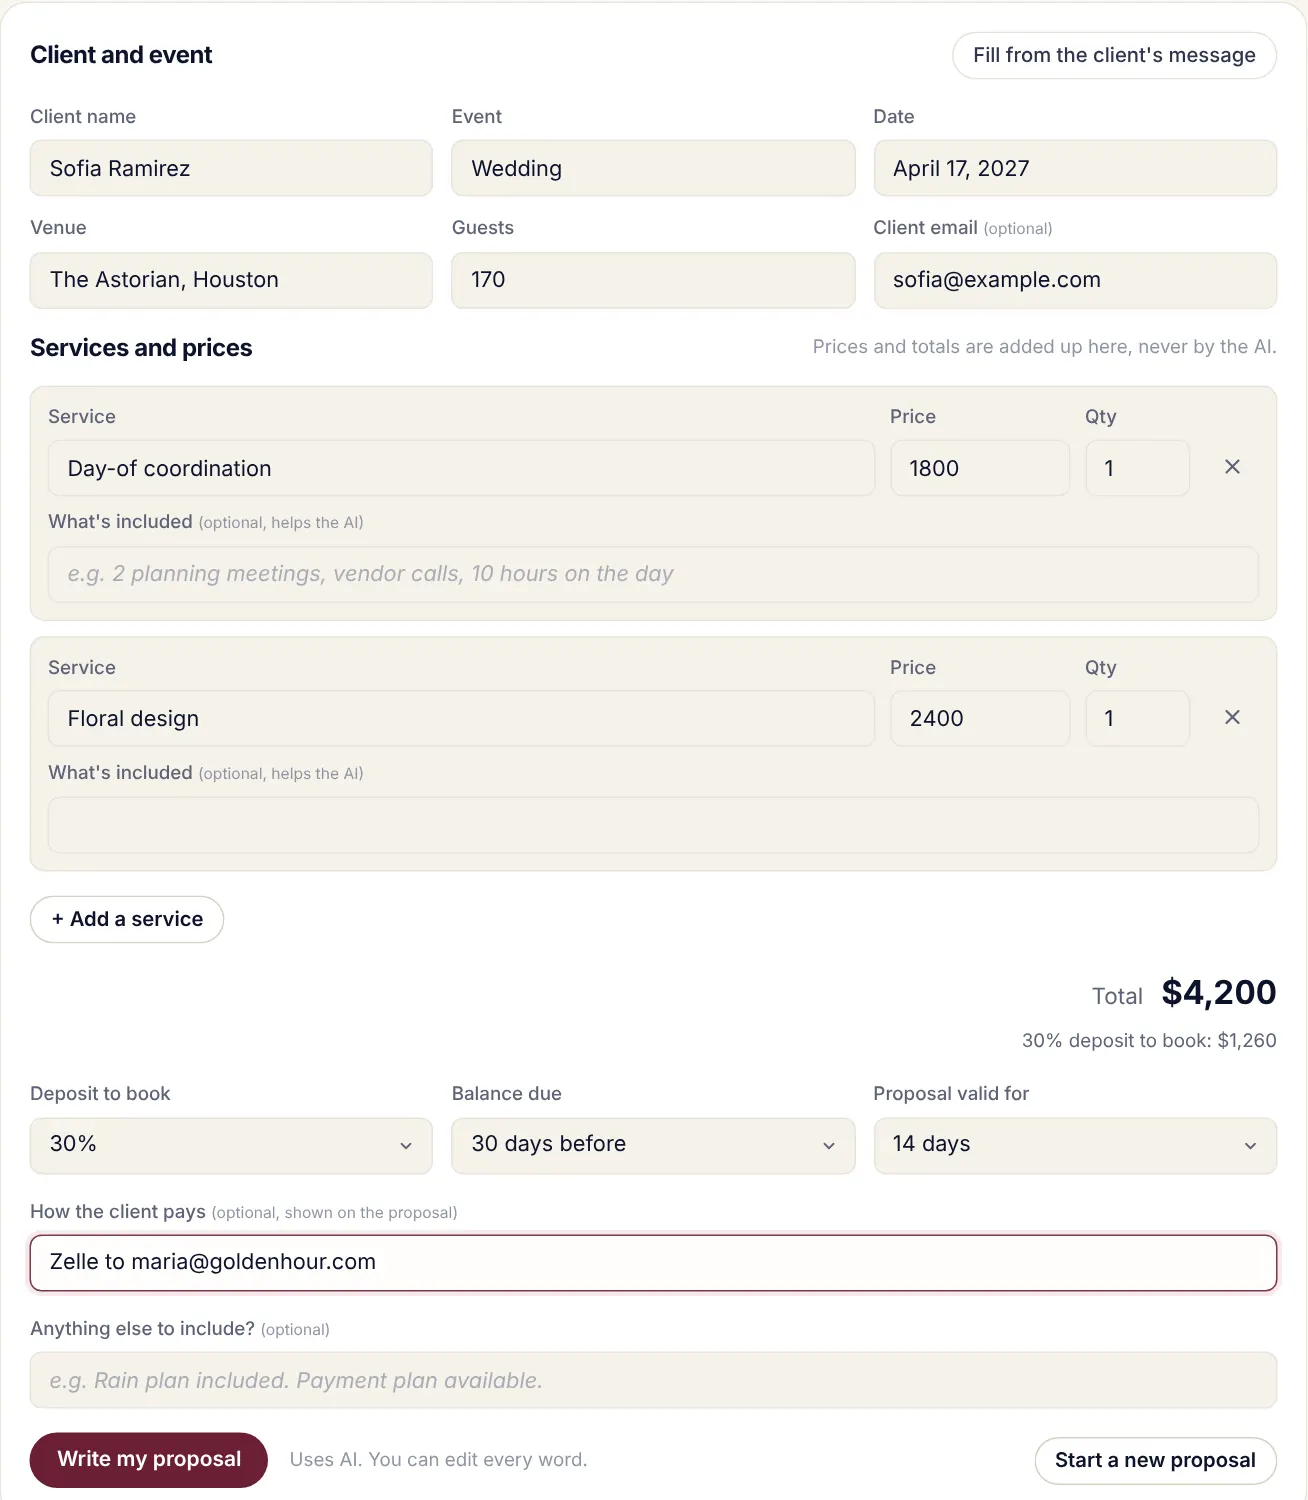
Fill in the proposal
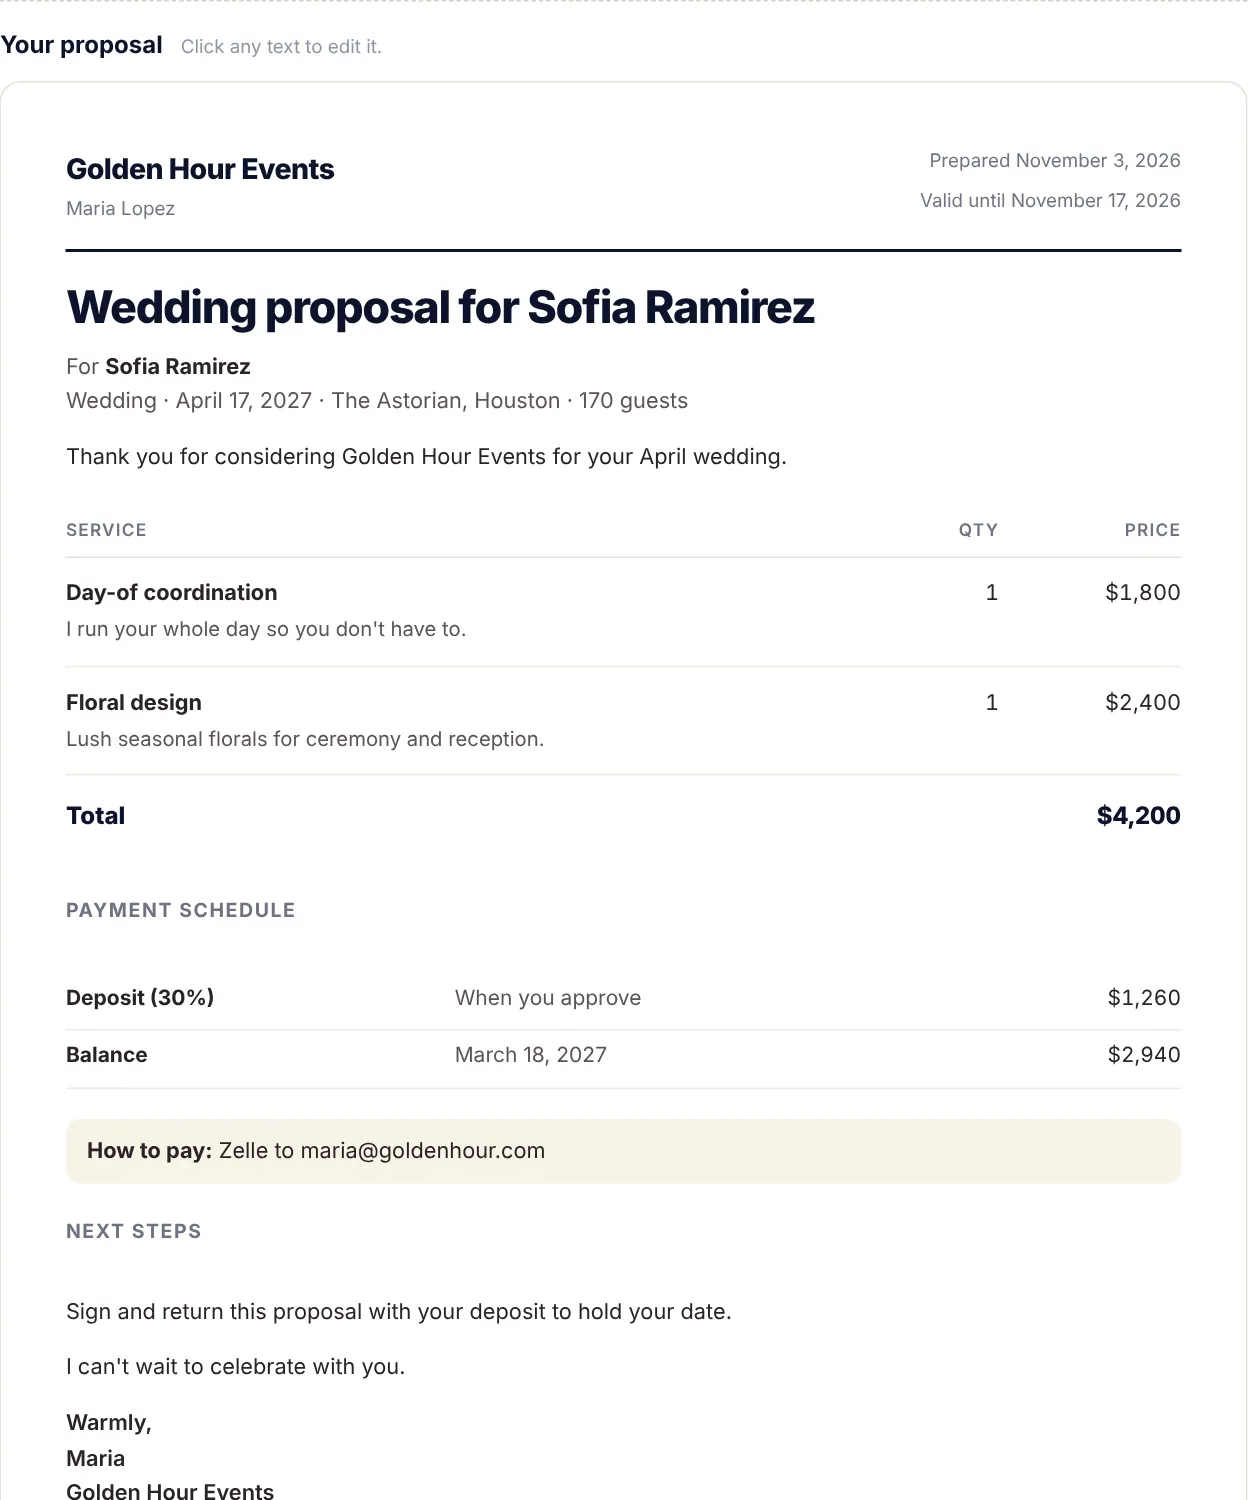
On the Proposal tab, add the client, event, date, venue, guests and email (Fill from the client’s message does this for you). List each service with its price and quantity, choose the deposit, when the balance is due and how the client pays. Totals are added up here, never by the AI.
-
Write and edit the proposal
Press Write my proposal. The AI writes the introduction and service descriptions from your words; the payment schedule is worked out from the event date. Click any text to change it.
-
Share it as a private client page
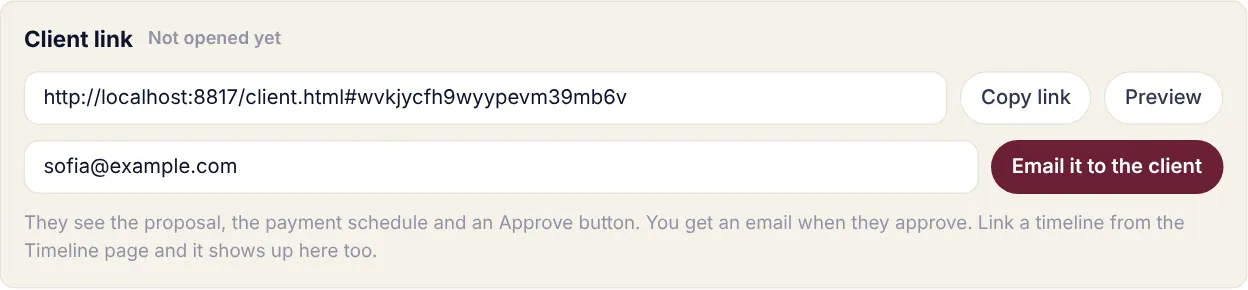
Press Share with client. Copy the link, Preview it, or press Email it to the client. The email comes from your business name via PlannerWick, and replies go to you.
-
Your client reads and approves
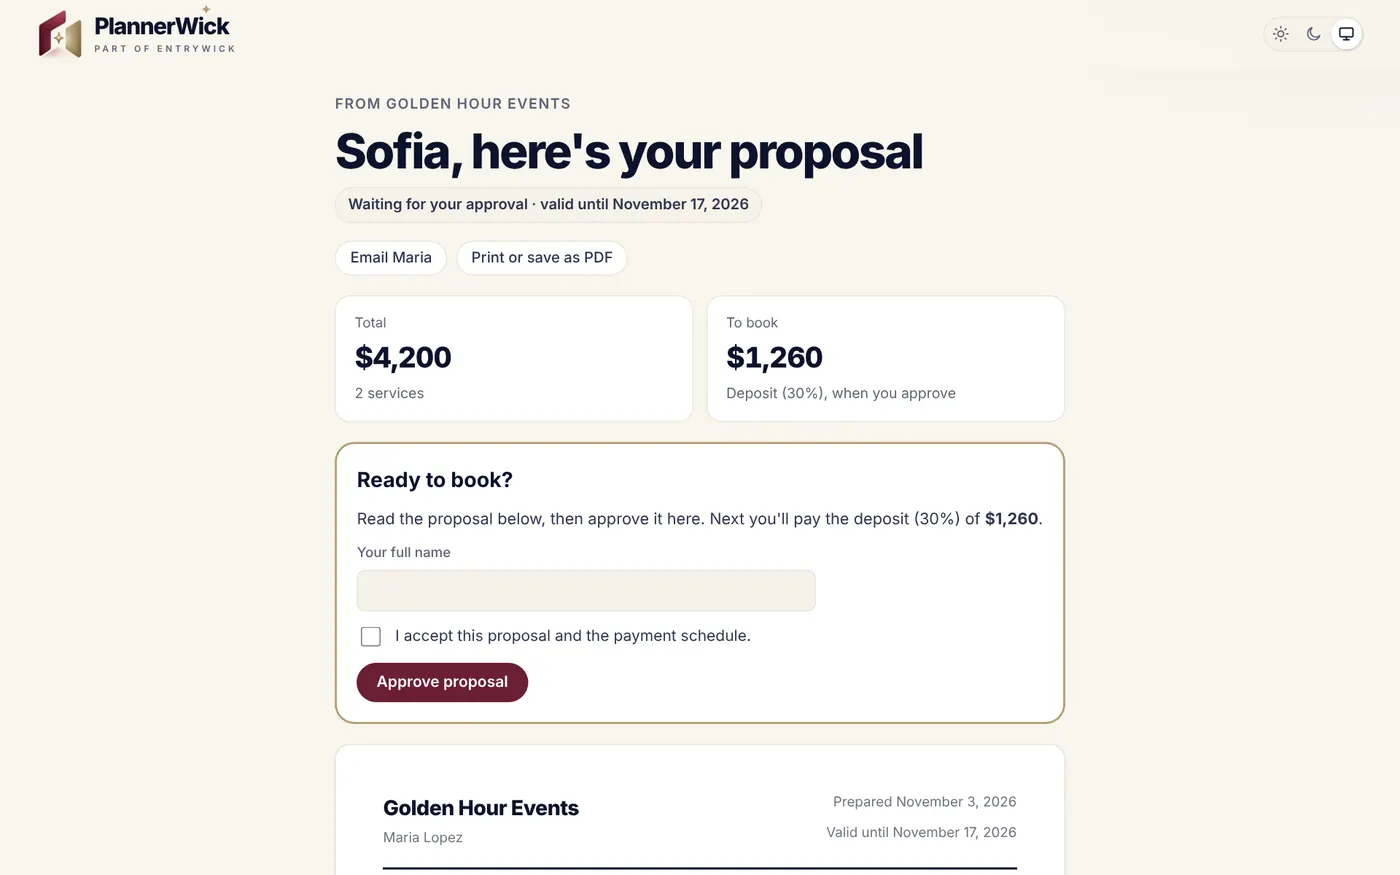
The client sees the total, the deposit to book, the full proposal and, if you link it, their day's timeline. They type their name, tick I accept and press Approve proposal.
-
You're told straight away
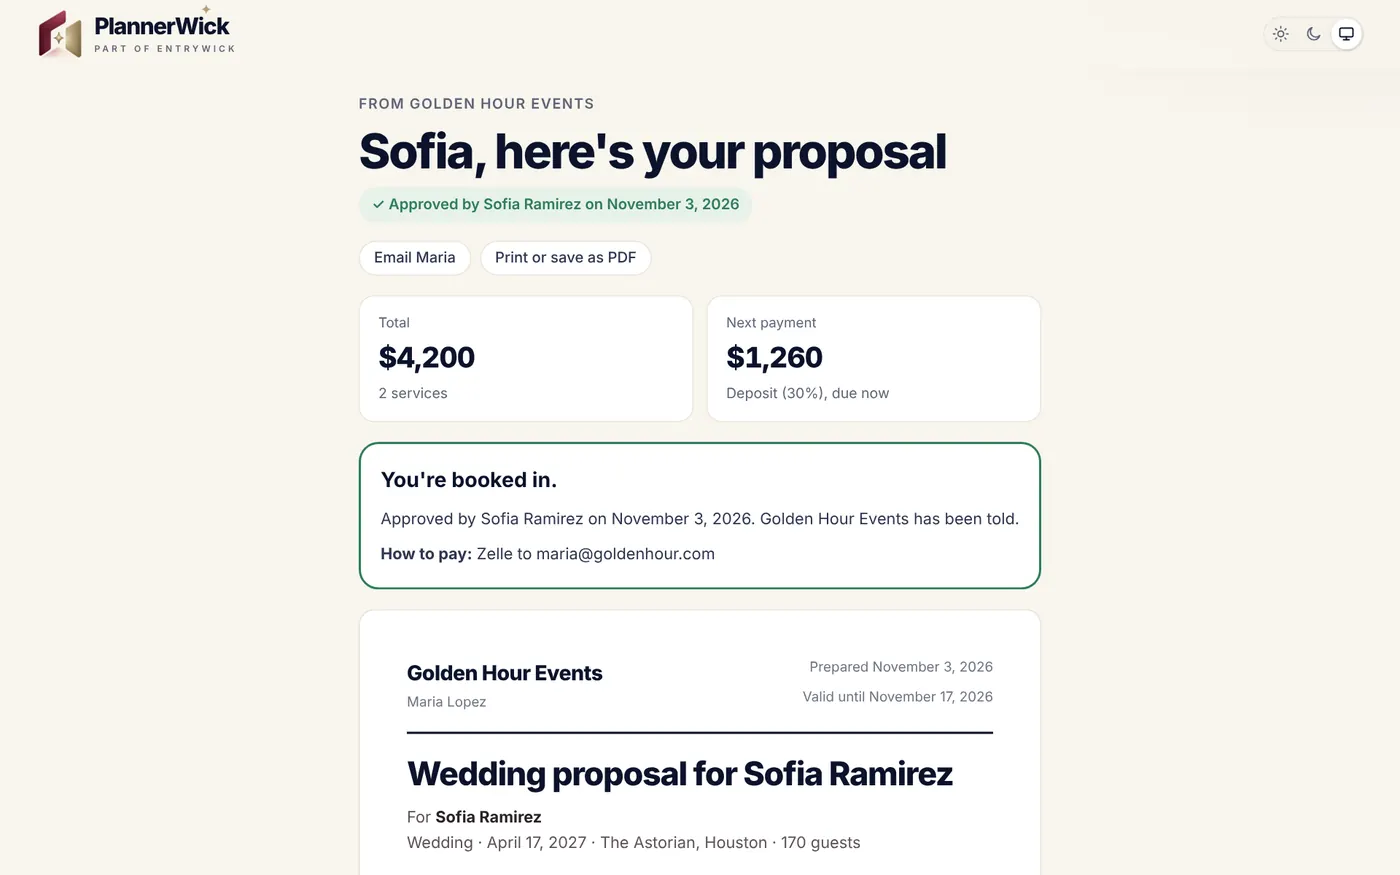
The page changes to “You're booked in”, you get an email, and the proposal is locked so it can't change after approval. Your clients lists every proposal as Not opened, Opened, Approved or Expired.
9Start from a template
40+ ready-made timelines for weddings, traditions and big celebrations.
-
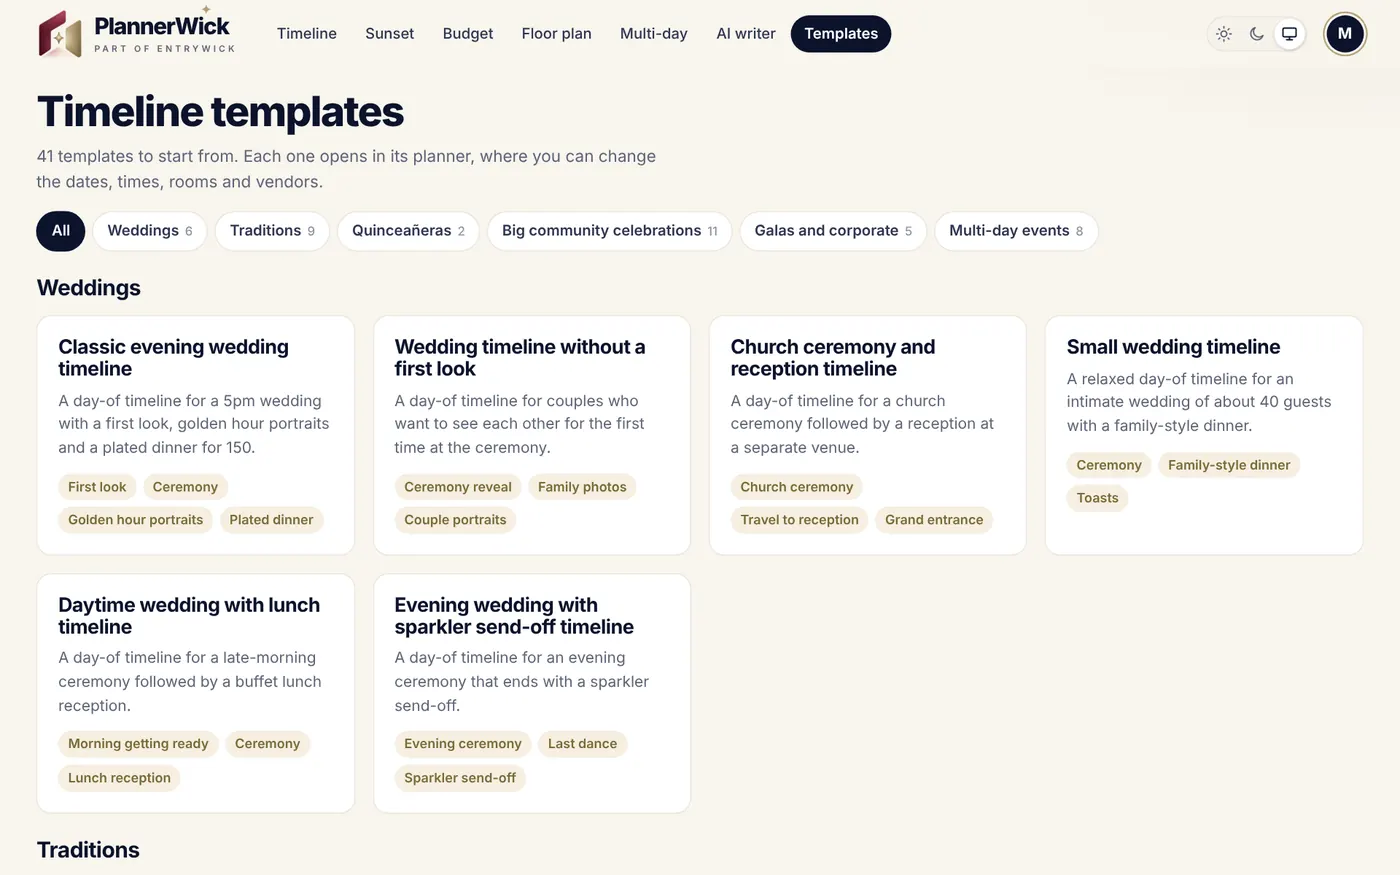
Pick a template
Filter by weddings, traditions, quinceañeras, big community celebrations, galas and corporate, or multi-day events. Each card lists its key moments. Open one and it loads into its planner, ready to change.
10Import from a spreadsheet
Guest lists and multi-day schedules from Excel or Google Sheets.
-
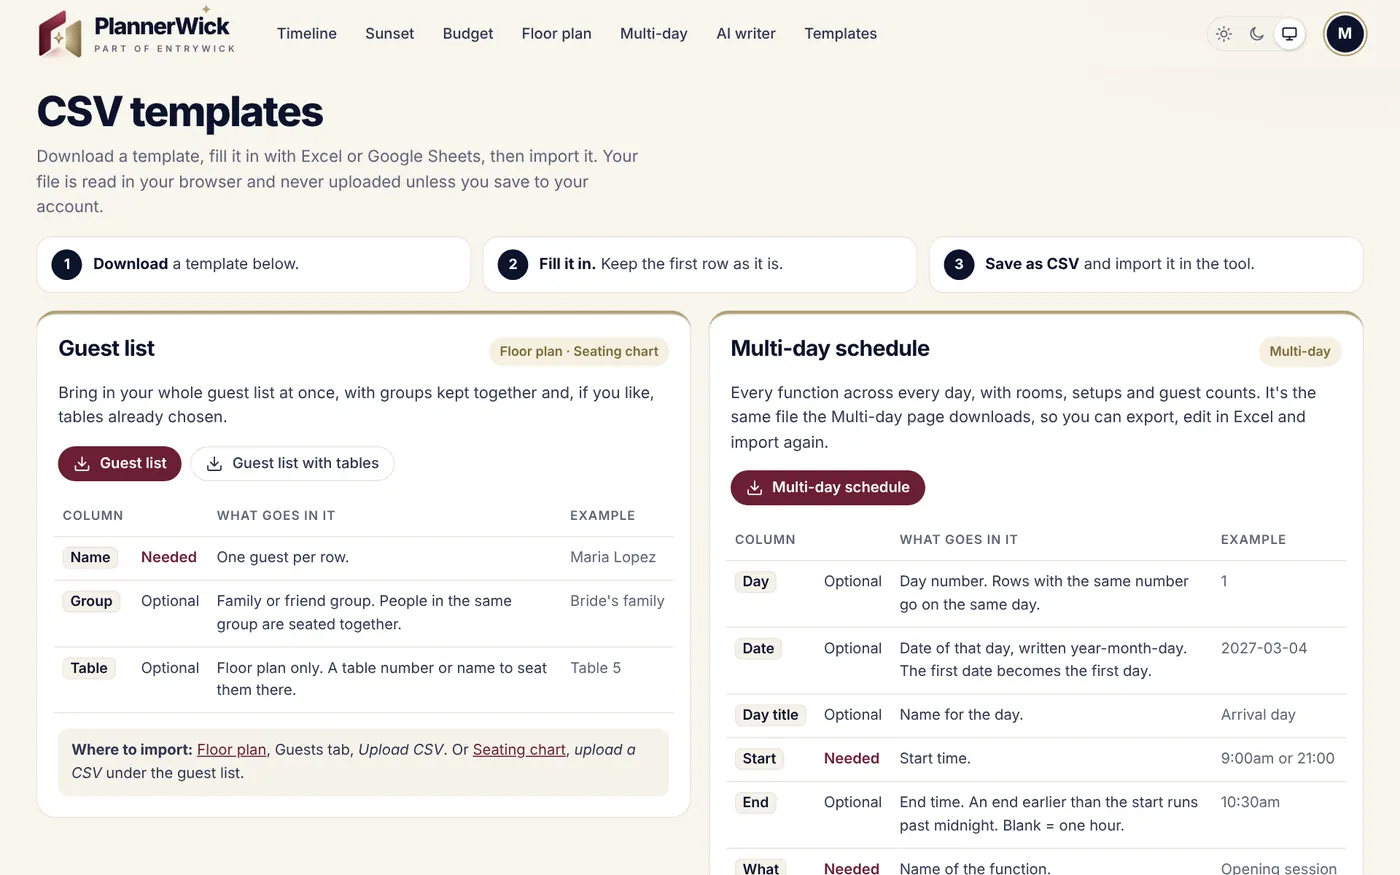
Download a template
Open CSV templates from the footer. Choose the guest list, guest list with tables, or multi-day schedule. Each lists its columns, which are needed and an example.
-
Fill it in and import
Keep the first row, save as CSV (in Excel choose CSV UTF-8), then import: Floor plan Upload CSV, Seating chart upload a CSV, or Multi-day Import schedule (CSV).